
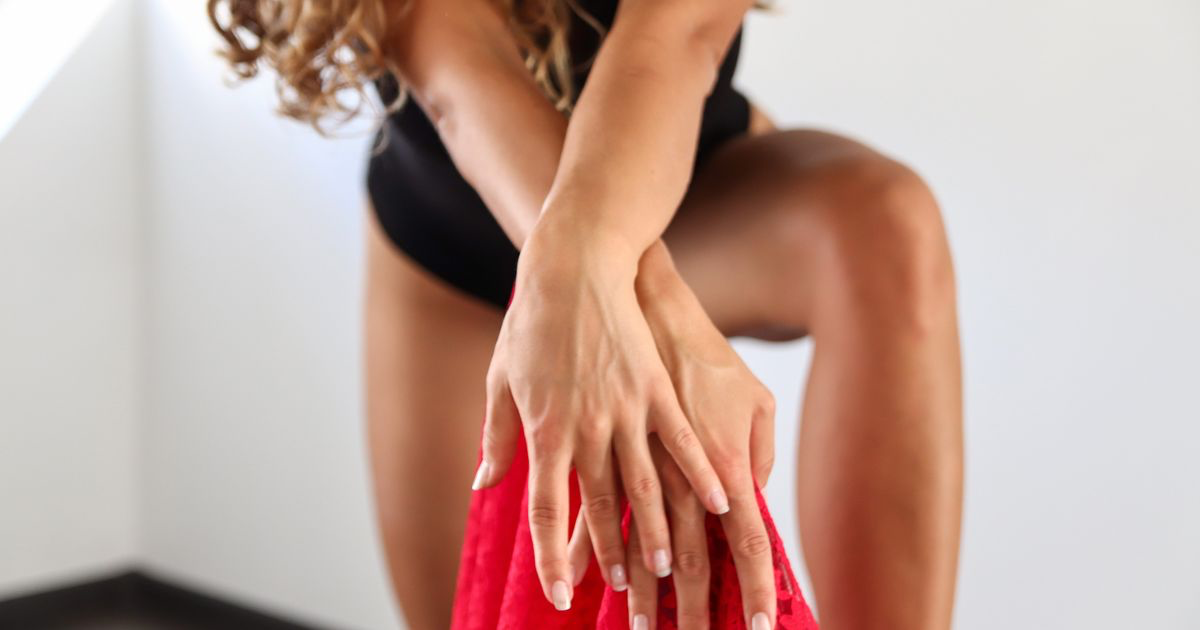
How to Pose Hands for Nail Photos: 10 Poses That Work
Quick answer: Pose hands for nail photos by asking for a completely relaxed hand, then setting a soft curve at the wrist, staggering the fingertips so no two nails sit at the same depth, and rotating the plates toward the lens. The ten poses below cover almost every set, and all of them work better with the wrist supported.
The set is beautiful and the photo looks like an evidence exhibit. Flat hand, fingers glued together, tendons standing up, knuckles white. The nails are fine. It is the hand that has no idea what to do with itself.
Why do posed hands look so stiff in nail photos?
Mostly because you asked the client to hold still. The moment anyone is told to pose, the fingers straighten and the tendons come up, and tension reads faster than any flaw in the set.
Flat hands also hide the work. A hand laid palm-down shows the tops of the fingers and only the edge of each nail, so the length and shape you built disappears into a line.
The last piece is movement. A hand with a slight bend at every joint reads as natural; one with no bend anywhere reads as a mannequin.
What is the basic pose that works on almost everyone?
Start with a soft curve. Ask the client to let the hand go completely limp, then lift it. You get a gentle downward curl through the fingers and a relaxed wrist, and that is the starting shape for nearly every set.
Then stagger the fingertips. Fingers in a straight row look like a comb, so let the index sit slightly forward, the middle a touch back, and the ring and little finger trail behind.
Tilt the nails toward the lens. The single biggest change most techs can make, and it takes a second: rotate the whole hand so the nail plates face the camera rather than the ceiling.
A soft bend at the wrist does the rest, and a locked straight wrist is what separates an editorial hand shot from a passport photo. Tuck the thumb behind the fingers while you are at it, unless the thumb nail is part of the design.
The 10 hand poses, and when to use each
Two rules run underneath all ten. Support the wrist, because a hand held in mid air drifts and trembles however hard anyone concentrates. And give the hand a job, because a hand that is doing something stops performing.
- The floppy curve. Ask for a limp hand, lift it, let the fingers fall into a gentle downward curl. Your default, and the one to reach for when you have thirty seconds between clients.
- The staggered fan. The floppy curve with the fingertips pulled to different depths, index forward, little finger trailing. Use it whenever all five nails need to be legible at once.
- The supported wrist. Wrist on the desk, a folded towel or a stack of books, hand hanging loose off the end. The steadiest pose there is, and the one to use when the light is low and the shutter is slow.
- The cupped pair. One hand resting into the other, shot from above. The classic full set reveal, and the one to use when both hands are done. There is more on framing two sets in how to photograph both hands.
- The crossed wrists. One wrist laid across the other, hands relaxed in opposite directions. Gives the frame a diagonal instead of a row of ten fingers, which is what makes it read as a photo rather than a record.
- The bottle hold. Fingers curled loosely around a polish bottle or a cuticle oil pen. The curl is automatic, the styling is free, and the product sells the shot for you.
- The fabric drape. Fingers falling over a scarf, a jumper sleeve or a fold of towel. Best on long sets, because the fabric gives the tips somewhere to sit without pointing at the lens.
- The chin rest. Back of the fingers against the jaw, hand relaxed. Very natural, and worth it for a hero shot, though it puts skin and nails in the same frame so the prep has to be clean.
- The hair touch. Fingers loosely through the hair near the temple. The least posed-looking pose on the list, and the reason it works is that the hand has an actual reason to be there.
- The desk lean. Forearm along the desk edge, hand dropping off the front, nails toward the camera. Good for short sets, because looking slightly down the finger lengthens the visible plate.
One warning that applies to every prop on the list: keep it dull. A dramatic flower or a bright coffee cup wins the photo outright and the nails become the background.
How do you pose for different nail shapes and lengths?
Long nails, stiletto and almond
Shoot slightly from above and in front, so you see the full taper of the tip rather than looking at it end on. Curve the fingers more deeply than usual, which stops long tips reading as claws and shows the C-curve in profile. Avoid pointing the tips straight at the lens, because fingers aimed at the camera foreshorten.
Short and natural nails
Angle the hand so you look slightly down the length of the finger, which lengthens the visible plate and makes short sets look neater. Extend rather than curl here, because a straighter finger gives short nails more surface area to show. Clean prep does a lot of the posing work on short sets.
Both hands together
Overlap them instead of lining them up. One hand across the wrist of the other gives the frame a diagonal rather than a straight row of ten fingers. Keep both sets roughly the same distance from the lens, or the far one goes soft.
Which posing approach fits you?
| Approach | Looks natural | Time per shot | Shows nail shape | Best for |
|---|---|---|---|---|
| Flat hand on the desk | Low, reads stiff | Fast | Poor, you see nail edges only | Quick before and after records |
| Relaxed curve, staggered fingers | High | About a minute | Excellent | Almost every set |
| Hands holding an object | Very high | About two minutes | Good | Reels, carousels, feed hero shots |
| Both hands overlapped | High | Two minutes | Good on both sets | Full set reveals, portfolio pages |
| Fist or claw pose | Low, dated | Fast | Poor | Rarely worth it now |
The relaxed curve is your default. Everything else is a variation you reach for when you have a spare minute.
Pose is worth getting right in the room because it is not a fixable fault. A tense hand stays tense in every editor there is, whereas the colour, the brightness and the clutter behind it all wait for you, as the editing pass afterwards sets out.
How do you direct a client without making it awkward?
Never use the word "pose". Say "let it go floppy for me", then lift the hand and shape it yourself. You have been touching their hands all appointment, so placing the fingers takes three seconds and beats a minute of explaining.
Take the photo while they are talking. A hand that has forgotten it is being photographed is a relaxed hand, and you get a better frame mid-sentence than on a countdown. Shoot four or five frames and keep one.
One thing that catches people out: ask about jewellery before you start, not after. Taking a ring off at the end means reshooting everything.
A two-minute posing routine
- Prep first. Oil the cuticles, wipe the excess off the skin, take the rings off and check for dust before anything gets posed.
- Ask for a floppy hand, then lift it and set a soft curve at the wrist and through the fingers.
- Stagger the fingertips so no two nails sit at the same depth, and tuck the thumb out of the way.
- Rest the wrist on the desk or a folded towel, so the hand is supported rather than held.
- Rotate the hand until the nail plates face the lens, then shoot four or five frames while the client is chatting.
Where NailTech fits in
Posing is real work, done one-handed while you hold a phone in the other. What you cannot pose away is a warm cast from the ceiling lights, oil shine across the knuckles, or a towel corner that crept into frame while you concentrated on the fingers.
NailTech is a nail image editor built for that gap, and none of it touches the pose itself.
- Even out skin tone so the pose is what people notice.
- Calm oil shine left on the fingers and knuckles.
- Correct the colour cast so the set reads the shade it actually is.
- Tidy the background around a pose you already got right.
NailTech cannot unbend a stiff hand. Pose first, edit second.
A relaxed hand makes an ordinary set look expensive, and a tense one makes your best work look like a swatch.
Make your nail photos look salon-ready
Download NailTech and clean up the lighting, skin tone and background on every set you post, in a few taps.
Download on App StoreFrequently Asked Questions
How should you pose hands for nail photos?
Pose hands for nail photos by asking the client to relax the hand completely, then lifting it into a soft curve with a gentle bend at the wrist and fingers. Stagger the fingertips so no two nails sit at the same depth, tuck the thumb away, and rotate the hand so the nail plates face the camera.
Why do my hands look stiff in nail photos?
Hands look stiff in nail photos because being asked to hold still makes tendons stand out and fingers straighten. A flat, locked hand also hides the nail plate and shows only the nail edges. Giving the hand something to hold or rest on removes the tension without any instruction at all.
What is the best hand pose for long nails?
For long nails such as stiletto and almond shapes, curve the fingers more deeply and shoot slightly from above and in front so the full taper of the tip is visible. Avoid pointing the fingertips directly at the lens, because that foreshortens the fingers and makes long nails appear shorter than they are.
How do you photograph both hands at once?
Photograph both hands by overlapping them rather than lining them up, for example resting one hand across the wrist of the other to create a diagonal. Keep both hands roughly the same distance from the lens so neither set falls out of focus, and support the lower wrist on the desk for steadiness.
Final Takeaways
- Relaxed beats arranged. Ask for a floppy hand, then shape it yourself.
- Stagger the fingers. Equal depth reads as a comb, varied depth reads as a photograph.
- Turn the nail plates to the lens. Plenty of techs photograph the edges of their own work without realising it.
- Support the wrist. A rested hand does not shake and does not drift out of the pose.
- Hide the thumb unless the thumb nail is part of the design.
- Shoot a burst. The good frame is usually the third or fourth.
For the full workflow around the pose, read how to photograph nails. Get the light right with the best lighting for nail photos, and keep the frame quiet using the best background for nail photos.

Hannah
Hannah is a co-founder of NailTech, the nail image editor that turns quick phone shots into portfolio photos. She worked in the beauty industry before moving into mobile design, and now owns product and design on the app.



