
How to Photograph Nails So They Look Professional
Quick answer: Photograph nails in soft, indirect daylight, with the hand relaxed and the fingers angled slightly away from the camera. Clean the cuticles and skin first, shoot from about a foot away at nail height, and take a few frames from different angles so you can pick the sharpest one later.
You just finished a set you are proud of. The chrome is flawless, the smile lines are crisp. You pull out your phone, take a photo, and it looks nothing like what you are seeing.
Almost every disappointing nail photo comes down to four fixable things: the light, the angle, the hand, and the mess you did not notice until you zoomed in.
Why do nail photos never look like the real thing?
Nails are small, shiny and curved, about the hardest combination you can hand a phone camera. A gel finish behaves like a tiny mirror, reflecting whatever is around it: your ceiling light, your face, the phone itself.
Then there is colour. Your eyes quietly correct for the room and your phone does not, so your brain sees a soft nude pink while the camera records the yellow in the bulbs faithfully. That is why so many nude sets photograph grey.
What is the best lighting for nail photos?
Soft, indirect daylight is the best light for nail photos, and it is free. Set up near a window but out of direct sun, which burns out glossy finishes and throws hard shadows between the fingers.
Turn the overhead light off while you are there. Mixing daylight with a warm bulb puts two colour temperatures in one frame, which is why the hand comes out orange and the background blue in the same photo.
Never use the flash. It sits right next to the lens, so on a glossy nail it produces a white blob precisely where you wanted to show the finish.
Watch what the nails are reflecting, too. If you can see yourself in the nail, so can the camera, and a plain light top with clear space in front of the hand cleans up reflections better than editing will. There is more in our guide to the best lighting for nail photos. With no usable window, one soft lamp bounced off a white wall gets you close.
What angle should you shoot nails from?
Shoot from just above nail height, not from directly overhead. A flat top-down shot erases the apex you spent time building, while a low angle over the fingertips lets light travel across the surface and show the shape. Our breakdown of the best angle for nail photos covers how this changes by nail length.
Get closer, then stop. Eight to twelve inches is the sweet spot; any closer and phone lenses distort, making the front fingers look huge and the back ones tiny. If your phone has a 2x lens, use it.
Tap to focus on the nails, because phones love focusing on knuckles. Then take the set from three or four angles: straight on, a slight tilt, closer on two fingers, and one side profile for the apex.
How should the hand be posed?
A relaxed hand photographs better than a posed one. Tense fingers show tendons and knuckle creases, and the nails end up competing with the anatomy for attention. Ask your client to shake the hand out, then let it settle. Poses that consistently work, covered in how to pose hands for nail photos:
- The soft curl. Fingers gently curved, as if holding an invisible egg. Shows the full nail plate and hides the fingertips.
- The resting hand. Laid on a plain surface, fingers spread and staggered so no nail hides behind another.
- The chin rest. Hand loosely near the face or jaw, good for longer sets.
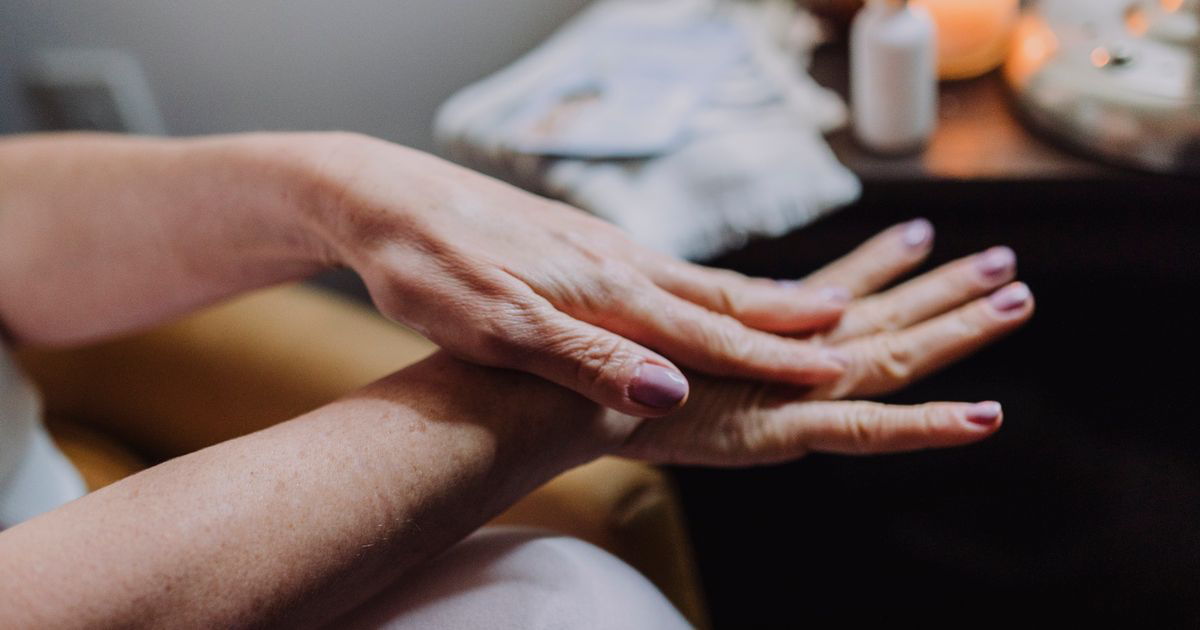
- The two-hand overlap. One hand on the other, staggered so all ten nails show.
Stagger the fingers and watch the thumb: parallel fingers read as stiff, and a thumb sticking straight out drags the eye off the set.
What should you clean up before you shoot?
Everything the camera will magnify, which is more than you think. A phone screen at arm's length hides what a zoomed-in photo on someone else's feed will not. See how to prep nails for photos for the full checklist:
- Wipe the tacky layer and any dust off every nail.
- Clean cuticle oil off the skin, or the area goes shiny and blotchy. Oil the cuticle, then blot.
- Remove product residue from the sidewalls and under the free edge.
- Push back any lifted cuticle skin, because the camera reads it as untidy work even when the nails are perfect.
- Check for lint, glitter and filings on the hand and the surface underneath.
- Clear the background: no bottles, no phone, no cluttered desk.
- Take rings off unless they are part of the look, because metal next to a soft colour steals the highlight.
| Common mistake | What it does to the photo | Quick fix |
|---|---|---|
| Overhead salon light | Yellow cast, hard glare spots | Shoot by a window, lights off |
| Camera flash | White blowout on the glossy finish | Never flash, use one soft source |
| Directly top-down angle | Flat nails, no visible apex | Drop to just above nail height |
| Phone too close | Distorted fingers, soft focus | Back up and crop, or use 2x |
| Cluttered background | Eye goes to the mess, not the set | Plain towel or solid surface |
| Tense, straight fingers | Stiff and unflattering | Shake out, then soft curl |
How do you keep your photos consistent across a whole portfolio?
A grid where every shot has a different colour cast and background looks like a scrapbook. One consistent look reads as a brand, an argument made at length in how to build a nail portfolio.
Pick one spot and keep it: same window, same surface, same distance, one neutral background that lets the nails carry the colour. Shoot at the same point in the appointment every time, right after the final wipe and before the client picks up their bag. It is the only moment the nails will ever look that good.
A five-minute setup you can start using today
- Choose your photo spot. The window with the softest daylight, with a plain towel kept there permanently.
- Switch the overhead light off before you shoot, every time, and check the flash is off.
- Clean the hand. Wipe the nails, blot oil off the skin, brush away filings, take rings off.
- Pose and relax. Ask for a shake-out, then set the hand into a soft curl with the fingers staggered.
- Shoot four frames, then edit the same day. Straight on, slight tilt, close on three fingers, side profile for the apex.
Where NailTech fits in
Even a well-lit phone shot usually needs a little correction: the colour is slightly off, the background has a shadow in the corner, the skin looks redder than in real life. That is the last stretch between a decent photo and a portfolio photo.
NailTech is a nail image editor built for exactly that step, so you can take the shot at the end of the appointment and clean it up before the client has left the chair.
- Fix the cast so nudes look nude and reds look red.
- Even out skin tone without making the hand look plastic.
- Tidy the background so a stray bottle or cable stops pulling the eye off the hand.
NailTech will not save a photo taken under flash in a cluttered room, which is why everything above comes first. For the manual version, see how to edit nail photos.
Editing can correct a colour cast and tidy a background, but it cannot put back an apex you flattened by shooting from overhead. Get the light and the hand right first.
Make your nail photos look salon-ready
Download NailTech and clean up the lighting, skin tone and background on every set you post, in a few taps.
Download on App StoreFrequently Asked Questions
What is the best lighting for nail photos?
Soft, indirect daylight from a window is the best lighting for nail photos. It is broad enough to avoid harsh glare on glossy finishes and neutral enough to keep colours accurate. Turn off overhead salon lights so you are not mixing colour temperatures, and never use the camera flash, which creates a white blowout on shiny nails.
Should you take nail photos from above or from the side?
Shoot from just above nail height rather than directly overhead. A top-down photo flattens the nail and hides the apex and curve you built. A slightly lower angle lets light travel across the surface, showing shape and finish. Take a few frames from different angles, including one side profile, and choose the best one afterwards.
How do you stop nail photos looking yellow or grey?
Yellow and grey casts come from mixed or artificial lighting. Turn off warm overhead bulbs and use one light source, ideally daylight from a window. Keep the background neutral so your camera meters correctly, and correct any remaining cast in editing. Nude and pastel shades are the most sensitive, so check those on screen before the client leaves.
What should you do to the hand before photographing nails?
Wipe every nail clean of dust and tacky residue, remove product from the sidewalls and free edge, and blot cuticle oil off the surrounding skin so it does not photograph shiny. Tidy any lifted cuticle skin, brush filings off the hand and surface, and remove rings unless they are deliberately part of the look.
How do you make a nail portfolio look consistent?
Use the same spot, surface and lighting every time, and shoot at the same moment in the appointment, right after the final wipe. Pick one neutral background and keep it. Consistent framing and colour make a grid read as a professional portfolio, even when the individual sets are wildly different in style.
Final Takeaways
- Light beats gear. Soft daylight from a single source outperforms any phone setting or filter.
- Never flash, never top-down. Both flatten the finish and erase the shape you worked to build.
- Clean up before you shoot. Oil on the skin, dust on the nail and clutter behind it are what make good work look amateur.
- A relaxed, staggered hand photographs best. Shake it out, soft curl, tuck the thumb.
- Stay consistent. Same window, same surface, same moment in the appointment, and the grid starts reading as a brand rather than a scrapbook.

Hannah
Hannah is a co-founder of NailTech, the nail image editor that turns quick phone shots into portfolio photos. She worked in the beauty industry before moving into mobile design, and now owns product and design on the app.



