
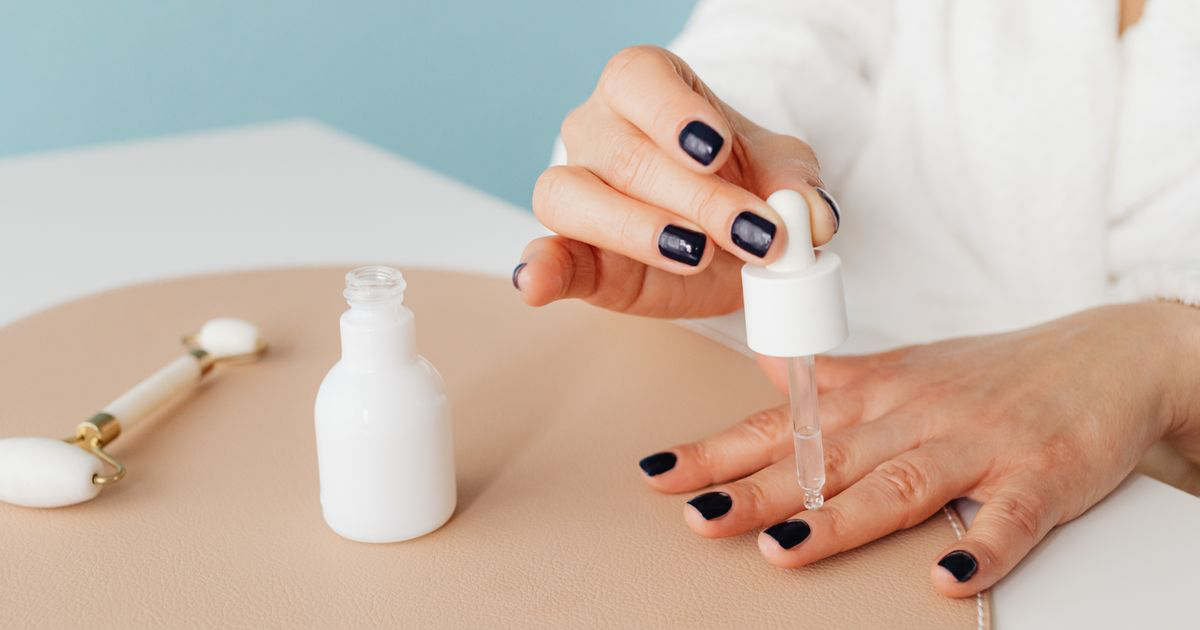
How to Prep Nails for Photos
Quick answer: Prep the hand before the camera comes out. Brush off filing dust, wipe the sticky layer, clean polish off the skin, push back any lifted cuticle skin, remove rings and watches, then apply the thinnest film of oil and give it a minute to sink in. Sixty seconds of prep saves ten minutes of editing.
The set is finished, the client is happy, you grab your phone. On the screen there is a speck of white dust sitting on the ring finger, a smudge of gel on the side wall you never noticed, and a wedding band throwing a chunk of light straight into the lens.
You could not see any of it from where you were sitting, and now it is the first thing anyone will look at.
Why does the camera catch things your eyes do not?
You have been looking at that hand for two hours from about eighteen inches away, at an angle, in your own peripheral vision while you worked. Your brain filed the dust away as normal ages ago.
A photo is flat and still, and the viewer's eye is free to wander over every millimetre of it with nothing else to do, so anything that breaks the pattern of clean skin and clean nail becomes the thing they look at. Phone cameras make that worse, because the processing sharpens fine detail hard and turns a barely-there speck of acrylic dust into a crisp white dot.
What should you clean off before you shoot?
Work through the hand in this order, because each step makes a mess the next one has to deal with.
Dust first. Filing and e-file dust settles in the cuticle line and along the side walls, and it is by far the most common thing that ruins an otherwise perfect photo. A dry brush, then a lint-free wipe, then check under a light.
Then the sticky layer, if your top coat leaves one. Uncleansed inhibition layer is slightly cloudy and slightly tacky, and it grabs every fibre in the room. It also dulls the shine you want the photo to sell.
Polish or gel on the skin is next. On the desk it looks like a hairline, but in a photo cropped to a hand it reads as a mistake, and it is the thing clients notice most in their own before-and-after pictures. An orangewood stick with a wipe wrapped round it clears it in seconds. While you are down there, check the free edge from underneath, because product wrapped under the tip shows up in any side-on shot.
What about the skin around the nail?
You are not doing a fresh manicure for the sake of a picture. You are just tidying the things that photograph badly: dry flakes on the eponychium, a stray hangnail, and any lifted skin sitting on the plate.
Redness is worth a beat of patience. If you have been working the cuticle area, the skin around it goes pink and stays pink for a few minutes. Photograph it straight away and you get an angry-looking hand. Wait, pose the other hand first, then come back.
How much cuticle oil should you use?
Less than you think, and earlier than you think.
Oil softens dry skin, deepens the colour of the nail slightly and makes the whole hand look finished. But a fresh pool of it sitting on top of the plate is a mirror, and a mirror photographs your ceiling lights as a hard white blob across the nail.
One drop, spread across all five nails, massaged in properly, then left for sixty seconds while you tidy the mat. If it still looks wet on screen, blot and shoot again.
Skip oil altogether on matte top coat. Oil is exactly what a matte finish is designed not to have, and it goes patchy the moment it touches.
Should the client take their jewellery off?
Rings, yes, almost always. A ring is bigger, shinier and higher contrast than any nail on the hand, so the eye lands on it first and stays there. Sliding it off for ninety seconds costs nothing.
Watches and bracelets are the same problem with a sleeve attached, and a sleeve brings its own colour that bounces onto the skin.
Two exceptions. If the set was designed around an engagement ring, or you are shooting a bridal set, the ring is half the point, so leave it on and pose so it sits behind the hand rather than in front of the nails.
Does prep change by service?
| Service | Biggest photo problem | Prep that fixes it |
|---|---|---|
| Gel-x and tips | Dust in the sidewalls, visible seam at the cuticle | Brush and wipe twice, shoot slightly off-axis so the seam is not head-on |
| BIAB and overlays | Cloudy inhibition layer, dull shine | Cleanse thoroughly, check the shine on screen before the client stands up |
| Acrylic | White dust everywhere, oil pooling in the apex | Dry brush the whole hand, oil sparingly and blot |
| Nail art and 3D charms | Fibres and lint caught on the design | Air blower or a soft brush, never a fluffy towel |
| Matte finishes | Fingerprints, and any oil at all | Handle by the sides, no oil, wipe the plate with a dry lint-free pad |
| Pedicures | Dry heel skin and lint from the toe separator | Remove the separator, moisturise the whole foot, wipe the nails dry |
What about your own kit?
Your phone lens lives in a pocket, in a salon, next to dust and hand cream. Wipe it on a microfibre cloth before every shoot, because a smeared lens is behind a lot of hazy, low contrast nail photos and no amount of editing brings that back. Your mat wants the same treatment: filings, glitter and old oil marks are all in frame and all in focus, though this is the one item on the list that can be dealt with afterwards if you miss it, in how to remove the background from nail photos.
A sixty-second prep routine
- Brush and wipe the hand to clear filing dust from the cuticle line and side walls, then check under a light.
- Clean the skin of any gel or polish, and tidy hangnails and lifted skin around the plate.
- Take off rings and watches, and push sleeves back past the wrist.
- Apply one drop of oil across all five nails, massage it in, and let it settle for a minute.
- Wipe your phone lens and the mat, then take four frames and zoom in on one before the client leaves.
Where NailTech fits in
A clean nail on a clean hand photographs well on any phone made in the last five years, which is why prep is worth more than gear. It still only gets you most of the way.
What prep cannot fix is the thing you only see at home: one speck of dust you missed, skin that came out redder than the room looked, oil shine across the index finger.
NailTech is a nail image editor built for that last pass, on the same phone.
- Dull down oil shine on a nail that came out with a hot spot across it.
- Even out red or blotchy skin without turning the hand into plastic.
- Clean up the background when a bottle or a mark on the mat crept into the corner.
- Correct the colour so the gel matches the bottle rather than the salon bulb.
It works far better on a hand that was clean to start with, though. Editing is a finishing step, not a substitute for the brush.
A minute with a brush and a wipe removes more from a nail photo than an hour of editing ever will, and it happens while the client is still in the chair.
Make your nail photos look salon-ready
Download NailTech and clean up the lighting, skin tone and background on every set you post, in a few taps.
Download on App StoreFrequently Asked Questions
How do you prep nails for photos?
Prep nails for photos by brushing and wiping away filing dust, cleansing the sticky inhibition layer, removing gel or polish from the surrounding skin, tidying hangnails and lifted cuticle skin, taking off rings and watches, and applying one drop of cuticle oil massaged in and left to settle for a minute before shooting.
Should you use cuticle oil before taking nail photos?
Use a small amount of cuticle oil before nail photos, applied at least a minute in advance so it absorbs. Cuticle oil softens dry skin and deepens nail colour, but a wet film on the surface acts as a mirror and reflects ceiling lights as a hard white blob. Skip oil entirely on matte top coat.
Why does acrylic dust show up so badly in nail photos?
Acrylic dust shows up in nail photos because phone cameras apply heavy sharpening to fine detail, which turns a barely visible white speck into a crisp dot. Dust also collects in the cuticle line and side walls, exactly where the eye looks first. A dry brush followed by a lint-free wipe removes it.
Should clients remove rings before nail photos?
Clients should usually remove rings, watches and bracelets before nail photos. A ring is larger, shinier and higher in contrast than any nail on the hand, so it pulls attention away from the set. Exceptions include bridal sets and manicures deliberately designed around a specific ring.
How long does prepping a hand for photos take?
Prepping a hand for photos takes about sixty seconds once the routine is habit: brush and wipe, clean the skin, remove jewellery, apply and settle oil, then wipe the phone lens and the mat. Building the prep into the end of the appointment costs less time than editing the problems out afterwards.
Final Takeaways
- Dust is the number one culprit. Brush, wipe, then check under a light before the phone comes out.
- Clean the skin, not just the nail. A hairline of gel on the sidewall reads as sloppy work in a photo.
- Oil early and sparingly. One drop, massaged in, left a minute. Blot if it still looks wet on screen.
- Rings off. They out-shine every nail in the frame.
- Wipe the lens. A smeared phone lens is behind more hazy nail photos than bad lighting is.
- Wait for the redness to drop if you have been working around the cuticle.
Once the hand is ready, the rest is framing and light: see how to photograph nails so they look professional for the full run-through, the best lighting for nail photos for the setup, and how to pose hands for nail photos for what to do with the hand once it is clean.

Hannah
Hannah is a co-founder of NailTech, the nail image editor that turns quick phone shots into portfolio photos. She worked in the beauty industry before moving into mobile design, and now owns product and design on the app.



