
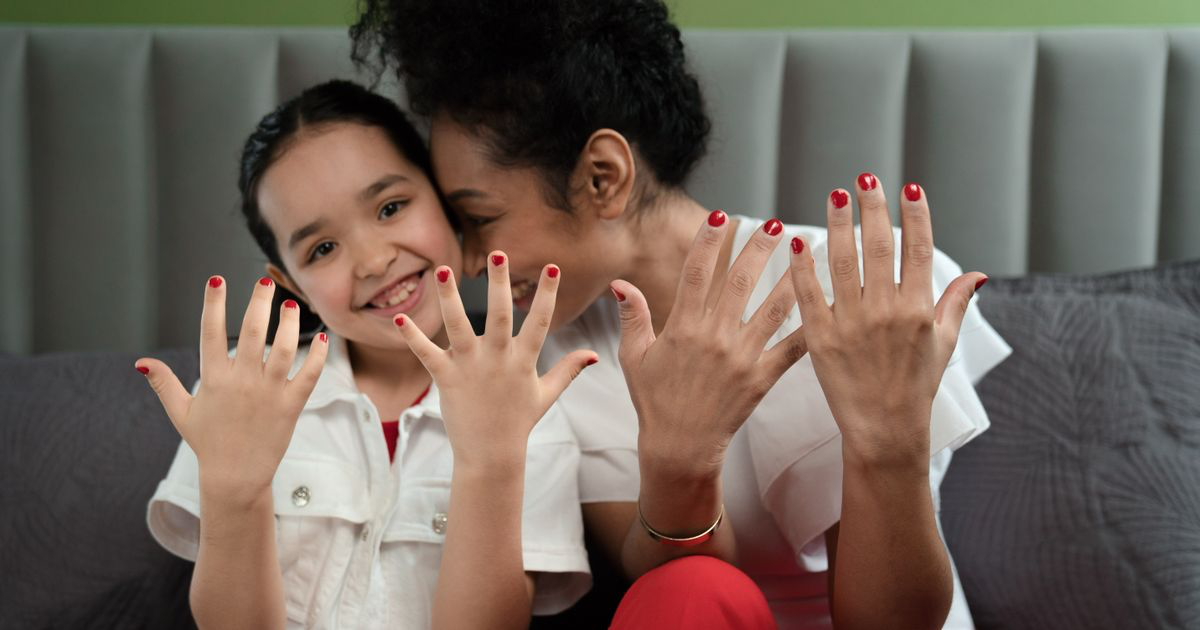
How to Photograph Both Hands in One Nail Photo
Quick answer: To photograph both hands in one nail photo, stagger them rather than mirroring them, keep all ten nails roughly the same distance from the lens, and back off to the 2x lens so the nearer hand is not enlarged. Rest both hands on the same surface so neither set falls out of focus.
Ten nails, one frame, and half of them soft. Or worse: two hands laid out symmetrically like a specimen, knuckles forward, every finger doing the same thing.
Both hands in one shot is the photo clients ask for and the one most likely to come back looking awkward.
Why do two-hand nail photos go wrong?
Three reasons, and they compound.
The first is depth. A phone lens at close range has very little in focus front to back, so if one hand sits even a few centimetres closer than the other, the far set goes soft. You noticed the nearer hand was sharp on the screen and assumed the rest matched.
The second is distortion. Wide phone lenses enlarge whatever is nearest, which is exactly why nails look shorter in photos when the phone is too close. With two hands the effect is worse because the difference is visible: one set of nails is noticeably bigger than the other, and the eye reads that as a mistake rather than as perspective.
The third is symmetry. Placing hands as exact mirrors of each other produces a photo that looks clinical. Nothing in the frame leads the eye anywhere, and every finger competes with its twin on the other side.
How should you position two hands?
Stagger them, and let them overlap.
The arrangement that works most often is one hand resting slightly in front and below the other, with the fingers of the back hand visible in the gaps between the fingers of the front hand. Both wrists angle the same way rather than pointing at each other. It reads as a person holding their own hands, which is a thing people actually do.
Keep both sets of knuckles the same distance from the lens. That is the rule doing most of the work. If one hand needs to sit higher for the composition, put a folded towel under it so the height difference is in the wrist, not in the distance to the camera.
A few arrangements worth having in your head:
- One hand resting across the back of the other, fingers staggered so all ten nails show.
- Both hands cupped loosely together with the fingertips meeting, shot from just above.
- Hands side by side but offset by half a hand length, one slightly rotated.
- One hand holding the opposite wrist, which frames the set and gives the fingers somewhere to be.
The general posing rules in how to pose hands for nail photos all still apply. Curved fingers, no straight lines, no tension in the knuckles.
How do you get all ten nails in focus?
Flatten the depth first, then shoot from further away.
Rest both hands on the same surface, at the same height, and tilt them the same amount. If every nail is in roughly the same plane, a phone will hold all ten sharp without any effort. Most out-of-focus two-hand shots are really posing problems that focus is being blamed for.
Then step back and zoom. Shooting from about a foot away on the 2x lens keeps the perspective honest and gives you more depth than pushing the phone in close on the main lens. This is the same reasoning as in the best angle for nail photos.
Portrait mode is a poor idea here. It is guessing at a single subject plane, and with two hands at slightly different distances it usually blurs one set of tips into the background. There is more on where it helps and where it hurts in portrait mode for nail photos.
Tap and check, do not trust the preview
Tap to focus on the nails of the hand that is furthest away, then look at the near hand. If both look acceptable on the screen, pinch into the photo afterwards and check one nail on each hand at full size. The screen at normal size hides a lot of softness.
When should you shoot both hands and when should you not?
Both hands are worth it when the design only makes sense across all ten nails, or when the client's hands are the story rather than one nail is.
Matching sets where left and right differ, a design that runs across the fingers, a full-set reveal, a bridal set, a first post after a long appointment: those all justify the extra minute.
For most other posts a single hand is a stronger photo. One hand fills the frame, holds focus easily, and shows the finish at a size people can see on a phone screen. A two-hand shot at 4:5 gives each nail a fraction of the space, and detail like a smile line or a chrome shift disappears.
The practical compromise is to shoot both, and post them as a pair. A carousel with the wide two-hand shot first and a tight single-hand detail second gives you the reveal and the craft, and Instagram carousels for nail techs covers how to order them.
How do the shot options compare?
| Shot | Nails visible | Focus difficulty | Detail per nail | Best used for |
|---|---|---|---|---|
| Single hand, tight crop | 4 to 5 | Low | High | Everyday feed posts and finish detail |
| Both hands, staggered | 8 to 10 | Medium | Medium | Full-set reveals and matching designs |
| Both hands, symmetrical flat lay | 10 | Low | Low | Price lists and service menus, rarely a feed post |
| Both hands, one in front and out of focus | 5 sharp | High | High on the front hand | Deliberate depth, when you actually want it |
The flat lay is the one people default to and the one that performs worst, because it reads as documentation rather than as a photo of somebody's hands.
Whichever you pick, two hands fill a frame sideways and the grid wants a square, so decide the crop before you post rather than letting Instagram take the outside fingers off for you. How to crop nail photos for Instagram covers what survives the profile grid.
A two-minute setup for a two-hand shot
- Put both hands on the same surface at the same height, with a towel under either wrist if needed.
- Stagger them, one slightly forward and rotated, never mirrored.
- Check the fingers do not overlap the nails, and open the gaps so all ten are visible.
- Back off to about a foot on the 2x lens and tap to focus on the further hand.
- Shoot a burst while the client breathes out, then check one nail on each hand at full zoom.
Where NailTech fits in
Two hands in one frame means twice as much skin, twice as many rings, twice as much desk behind them, and a photo that ends up needing more correction than a single-hand shot ever does. The lighting also lands unevenly across a wider subject, so one hand often comes back warmer or brighter than the other, and fixing that by hand means selecting one half of the image and matching it to the other. That is fiddly work in a general photo app.
NailTech is a nail image editor built for exactly this kind of correction on a phone.
- Even the light across both hands so one does not read warmer than the other.
- Correct the salon bulb across a wider frame in one pass.
- Settle skin tone so ten fingers do not pull attention off the nails.
- Clear the background that a wider shot inevitably drags in.
NailTech will not bring the far hand back into focus. Sharpness is decided by where the hands sat, which is why the towel under the wrist is step one rather than an afterthought.
Two hands at different distances from the lens will always give you one sharp set and one soft one. Equal height beats every camera setting you could reach for afterwards.
Make your nail photos look salon-ready
Download NailTech and clean up the lighting, skin tone and background on every set you post, in a few taps.
Download on App StoreFrequently Asked Questions
How do you photograph both hands in one nail photo?
Photograph both hands by resting them on the same surface at the same height, staggering one slightly in front of the other rather than mirroring them, and shooting from about a foot away on the 2x lens. Equal distance from the lens keeps all ten nails sharp and stops one hand looking larger.
Why is one hand always blurry in two-hand nail photos?
One hand is blurry because a phone lens at close range holds very little in focus front to back, so even a few centimetres of difference in distance pushes the far hand out. Levelling both hands to the same height and backing off to the 2x lens fixes it without any camera settings.
Should you use portrait mode for a two-hand nail photo?
Avoid portrait mode for a two-hand nail photo. Portrait mode estimates a single subject plane, and with two hands at slightly different distances it commonly blurs the fingertips of one set into the background. The standard photo mode at 2x from about a foot away gives a more reliable result.
Is it better to post one hand or both hands?
One hand is usually the stronger feed post, because each nail gets more of the frame and detail like a smile line or chrome shift stays visible on a phone screen. Both hands suit full-set reveals and designs that run across all ten nails. Posting a wide two-hand shot and a tight single-hand shot as a carousel covers both.
How do you stop two-hand nail photos looking stiff?
Stop two-hand nail photos looking stiff by breaking the symmetry. Offset one hand by half a hand length, rotate it slightly, curve the fingers rather than straightening them, and let the hands touch or overlap. Mirrored hands with straight fingers read as a diagram rather than as a photograph.
Final Takeaways
- Level both hands to the same height before worrying about focus.
- Stagger and overlap, because mirrored hands look clinical.
- Shoot from a foot away on 2x, not close on the main lens.
- Skip portrait mode, which picks one hand and softens the other.
- Check one nail on each hand at full zoom before you let the client go.
- Pair it with a tight single-hand shot so the detail is not lost at feed size.

Hannah
Hannah is a co-founder of NailTech, the nail image editor that turns quick phone shots into portfolio photos. She worked in the beauty industry before moving into mobile design, and now owns product and design on the app.



