
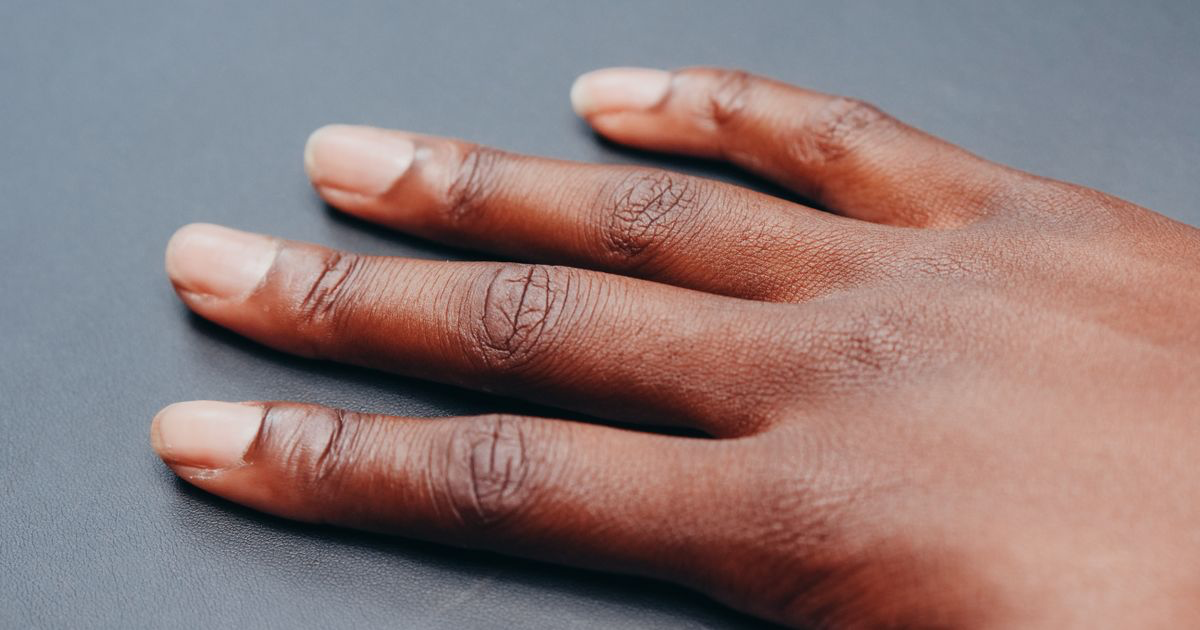
Best Background for Nail Photos
Quick answer: The best background for nail photos is a plain, matte, mid-tone surface that sits a shade or two away from the skin tone of the hand. Grey or greige works for almost every set. Keep it clean, use the same one every time, and let the nails be the only detail in the frame.
You take the photo, the set is flawless, and then you look at the screen and the first thing you see is a bottle of top coat, half a phone charger and the corner of somebody's handbag. The nails are in there somewhere.
Why does the background matter so much for nails?
Nails are small. Five of them might take up a fifth of a phone frame, and everything else in that frame is competing with them. Clutter usually wins, because the eye goes wherever there is most to look at.
Backgrounds also bounce colour, which is the part most people miss. A bright pink towel under a nude BIAB set throws pink light up onto the fingers and shifts the shade you spent an hour matching. Your camera records that bounced light as though it were the real colour of the polish.
And backgrounds date a feed faster than nail art does. Marble contact paper and fairy lights both read as a specific year.
What colour background works best?
Mid-tone neutrals are the safest choice. Grey, greige, warm stone and soft taupe all sit between the brightness of skin and the brightness of most polish, so nothing gets swallowed and nothing blows out.
Pure white is harder than it looks. White reflects a lot of light back at the camera, which convinces your phone the scene is brighter than it is, so it darkens everything and the hand comes out grey and muddy. You can absolutely shoot on white, but plan on brightening the photo afterwards.
Black is harder still, and for the opposite reason. It looks striking under chrome and cat eye, but your phone over-brightens to compensate for all that dark, and the skin goes pale and flat. Use black when you mean to, not because it was the mat nearest the desk.
The other thing worth saying: contrast with the set, not with the skin. Dark almond nails vanish on a dark mat. Pale nudes vanish on cream. Pick the surface after you have looked at the finished hand.
What about coloured or patterned backgrounds?
One muted accent colour is fine. A dusty sage or a clay mat can look lovely and still stay quiet enough to ignore.
Patterns are a different matter. Marble, florals and glitter add detail in exactly the place you need none, and if your eye can read a texture in the background it is reading that instead of the smile line you just perfected.
What material should you actually use?
Matte beats shiny every time. A gloss surface reflects your ceiling lights straight back into the lens and puts hot spots behind the hand.
Cheap options that genuinely work:
- A plain cotton or linen tea towel in grey or oatmeal, ironed flat.
- Thick matte card, around A3, or a proper paper photography backdrop taped to the desk.
- A neutral silicone or vegan leather desk mat, which wipes clean between clients.
- The inside of a plain cardboard box, which gives you a curved corner with no visible edge.
Skip the fluffy fur mats. They shed, they show every speck of acrylic dust, and the pile catches little shadows that make an otherwise clean photo look busy.
Whatever you settle on, buy two. One lives on the desk and one stays clean, so a dusty mat never costs you the shot.
How do you keep the frame clean in a busy salon?
You do not need a tidy salon. You need about a foot of clear space around the hand, because everything past that falls outside a reasonably tight crop.
Check the four corners before you shoot. Bottles, wires, sleeves and the client's other hand all live in the corners, and corners are the last place anyone looks.
Jewellery is the other repeat offender. A chunky ring or a watch pulls the eye harder than any nail art, so ask the client to slip it off before you start posing, or angle the hand so it sits outside the frame. Their sleeve counts as a background too.
Shoot slightly tighter than feels natural. Cropping in later is easy. Inventing clean background that was never there is not.
Which background approach fits your setup?
| Background | Works for | Colour accuracy | Effort per shot | Cost |
|---|---|---|---|---|
| Plain grey or greige mat | Almost every set | Excellent | Low, it stays on the desk | Low |
| White card or paper | Bright colours, nail art | Good if you brighten after | Medium, marks easily | Low |
| Black card or velvet | Chrome, cat eye, glitter | Tricky, skin goes pale | Medium | Low |
| Patterned or marble print | Very little | Poor, distracts and bounces colour | Low | Low |
| Whatever the salon desk looks like | Nothing | Poor, clutter and colour bounce | None | Free |
Most techs get further owning one good neutral mat than five novelty ones.
Should you remove or blur the background instead?
Portrait mode is riskier on nails than on faces. Phone portrait modes have to guess where the subject ends, and long tips, stiletto points and negative space designs are exactly the shapes they guess wrong, so you end up with a soft smeared edge on the part of the nail you most wanted sharp.
Cleaning the background afterwards is the safer version of the same idea. Taking out a stray bottle or evening a patchy surface leaves every nail edge intact, and how to remove the background from nail photos goes through how far to take it.
Full cut-outs are worth avoiding. A hand floating on pure white with no shadow under it reads as a template rather than as your work, and clients notice that even if they cannot name it.
A two-minute background setup for your next client
- Buy one plain matte mat in mid grey or greige, and keep a clean spare in the drawer.
- Give it a permanent home on the corner of the desk nearest your best window, so you are never rebuilding the setup between clients.
- Wipe the mat and the hand before the photo, because dust, filings and smeared cuticle oil all show up more than you expect.
- Clear a foot around the hand and take the rings, watches and bottles out of frame.
- Check all four corners on screen, then shoot four frames slightly tighter than feels natural.
Where NailTech fits in
A folded towel and thirty seconds of clearing the desk solves the background on a normal day. The problem is the other kind of day: the mat is dusty, the salon is packed, and there is a top coat bottle in the corner of the frame that you do not spot until you get home.
NailTech is a nail image editor for that moment, working on the file that is already in your camera roll.
- Tidy the background so a stray bottle or a marked mat stops pulling focus.
- Correct colour bounce from a surface that turned out less neutral than you thought.
- Even out skin tone without turning the hand into plastic.
- Crop consistently so the whole grid looks like it came from one person.
It will not conjure a clean surface out of a completely cluttered frame. Clear the desk first and edit second.
Choose the background for how invisible it is, not for how nice it looks on its own.
Make your nail photos look salon-ready
Download NailTech and clean up the lighting, skin tone and background on every set you post, in a few taps.
Download on App StoreFrequently Asked Questions
What is the best background colour for nail photos?
The best background colour for nail photos is a mid-tone neutral such as grey, greige or soft taupe. Mid-tone neutrals sit between the brightness of skin and the brightness of most nail colours, so neither the hand nor the set gets lost. Neutral backgrounds also avoid bouncing coloured light onto the fingers.
Should nail photos have a white background?
A white background works for nail photos but needs care. White reflects a lot of light, which makes a phone camera darken the entire image and leaves the hand looking grey and muddy. If you shoot on white, expect to brighten the photo afterwards, and keep the surface matte rather than glossy.
What material makes a good nail photo backdrop?
Matte materials make the best nail photo backdrops: ironed cotton or linen cloth, thick matte card, paper photography backdrops, and neutral silicone or vegan leather desk mats. Matte surfaces avoid reflecting salon ceiling lights back into the lens. Avoid fur mats, which shed and trap acrylic dust and shadows.
Should I blur the background of my nail photos?
Blurring is risky for nail photos. Phone portrait modes estimate where the subject ends, and long tips, stiletto points and negative space designs are frequently misread, leaving smeared nail edges. Cleaning or tidying the background in a phone editor such as NailTech preserves sharp nail edges better than an automatic blur.
How do I take nail photos in a cluttered salon?
Clear roughly one foot of space around the hand rather than tidying the whole salon, place a plain neutral mat under the hand, and remove rings, watches and bottles from the frame. Check all four corners of the screen before shooting, and frame slightly tighter than feels natural so clutter falls outside the crop.
Final Takeaways
- One mat, always the same. Consistency across a grid is what makes it look like a brand rather than a camera roll.
- Matte and mid-tone neutral. Grey and greige flatter nearly every colour and finish.
- Contrast with the set. Dark nails want a lighter surface, nudes want something with a bit of depth to them.
- Patterns are noise. Marble and glitter compete with the detail you actually want people to see.
- Check the corners. Most ruined nail photos are ruined by something nobody looked at in a corner.
- Crop tight, clean after. Shooting a little tighter beats trying to rescue a busy frame later.
For the wider run-through of angles and prep, read how to photograph nails so they look professional. Pair a good background with the best lighting for nail photos, and if you are pulling shots together for clients, see how to build a nail portfolio.

Hannah
Hannah is a co-founder of NailTech, the nail image editor that turns quick phone shots into portfolio photos. She worked in the beauty industry before moving into mobile design, and now owns product and design on the app.



