
How to Photograph Pedicures
Quick answer: Photograph pedicures from foot height rather than standing over them, with the toes pointed slightly away and a clean surface under the heel. Get low, fill the frame with the front half of the foot, use soft side light instead of the overhead spots, and shoot before any oil goes on the skin.
Pedis are the most under-photographed service in most salons, and not because techs are lazy about it. Feet are awkward: the client is reclined, the light is behind you, and the only angle available is straight down from standing. Which is exactly the angle that makes a beautiful pedicure look like a chiropodist's before shot.
Why do pedicure photos look so unflattering?
Three things stack up, and none of them are about the toes.
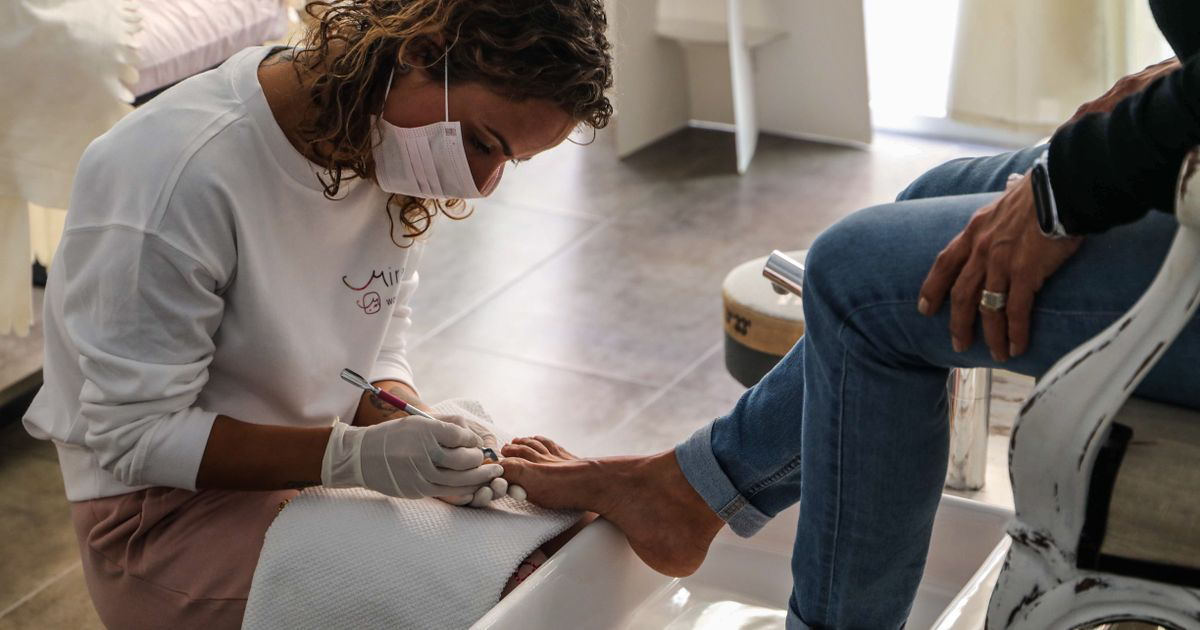
First the angle. Standing over a pedi chair puts the lens two or three feet above the foot pointing down, so you photograph the top of the foot, the ankle and a good portion of the floor. The nails occupy maybe a tenth of the frame.
Second the light. Pedi stations usually sit against a wall under a downlight, which throws a hard shadow off the toes and lights the shin more brightly than the plate.
Third, context. A pedi photo tends to include a footbath, a drain, a bin, somebody's shoes and a rolled-up trouser leg. Fix the angle and the frame and most of the problem goes with them.
What is the best angle for a pedicure photo?
Crouch until the lens is roughly level with the top of the foot, then shoot from the front and slightly to one side. At that height the toes read as a row of nails rather than a foot seen from space, and turning the foot across the frame at 20 or 30 degrees stops the big toe blocking the other four.
The front three-quarter view is the one that sells the service. Straight-on makes the foot look stubby and puts the sole in shot; straight from the side hides four nails. Between the two shows every nail and the line of the foot at once.
If crouching is not realistic, rest the foot on a stool or the chair arm so it comes up to you instead, which also lifts it away from the floor clutter.
Should you shoot one foot or both?
Both, but not in the same frame if you want detail.
Two feet side by side works as an establishing image, especially with the toes staggered slightly. It is also the frame where art on the accent toe becomes too small to read. Shoot the pair, then move in on one foot, the same four-shot habit that works for nail art: wide, close, angled, detail.
How do you light a pedicure without the overhead spot?
Bring the light in from the side, roughly level with the foot, and turn the downlight off.
Overhead light is the enemy of a pedi photo. Toenails sit at the far end of a foot that slopes away from the ceiling, so a downlight puts the brightest patch on the shin and drops the plate into shadow, and every colour looks a shade muddier than it is.
A window near the pedi chair is the best source, for the same reason as in best lighting for nail photos: a big soft source at subject height. A diffused lamp on a stand works too, placed to the side.
Avoid your own shadow. Crouching in front of a foot with the room light behind you puts your silhouette across the shot.
What should be in the frame, and what should not?
Keep the front half of the foot, a clean surface, and almost nothing else. Cut the frame off around the ankle, because every extra object competes with nails that are already small in frame.
A folded plain towel under the heel does most of the tidying. Mid-tone grey, sand or deep green, anything matte and neutral, following the same rules as best background for nail photos. White towels are standard salon issue and the worst choice on camera, because the phone exposes for the towel and leaves the foot dark.
Watch the edges too. A drain grille in the corner is the sort of thing you stop noticing in your own salon and everyone else notices first.
How do you prep feet for a photo?
The same sixty seconds you already spend on hands, plus one extra check.
Dust off the plate and skin, wipe polish off the sidewalls, and check the cuticle line, because a phone at close range shows every ragged edge the eye forgives. All covered in how to prep nails for photos.
The extra check is skin. Feet carry more dry skin and redness than hands, particularly around the heel and the joint of the big toe, and hard light exaggerates both. Oil goes on after the photo, because oiled skin under a lamp turns into a field of hot spots.
Toenails are also shorter and flatter than fingernails, so they carry less highlight and can look washed out. Slightly underexposing keeps the colour honest.
How do the editing options compare?
| Option | Time per photo | Skill needed | Handles skin redness on feet | Colour accuracy on gel polish | Cost |
|---|---|---|---|---|---|
| Straight out of the phone camera | None | None | No, often exaggerates it | Shifts under salon downlights | Free |
| Instagram or TikTok filters | Seconds | None | Blurs skin and the nails with it | Poor | Free |
| Lightroom or Photoshop on a desktop | 5 to 15 minutes | High | Excellent with local adjustments | Excellent | Subscription |
| NailTech on your phone | About a minute | Low | Good, built for skin around nails | Built for gel shades | App purchase |
The column to read is the middle one. Feet photograph redder than they look, particularly around the heel and the sides of the big toe, and a filter that blurs the redness away blurs the polish edge with it. Correcting the tone while leaving the nails alone is the same job as on a hand, and how to fix skin tone in nail photos covers it.
A two-minute setup for a pedi
- Raise the foot onto a stool or the chair arm so you are not shooting from standing.
- Put a mid-tone folded towel under the heel and clear everything else out of frame.
- Move one soft light to the side at foot height and switch the downlight off.
- Get level with the top of the foot and turn it 20 to 30 degrees across the frame.
- Shoot the pair, then one foot close, and oil the skin only once you are done.
Where NailTech fits in
Feet bring one problem hands do not: the client's skin takes up more of the frame than the nails do. Redness round the joints, dry patches on the heel, a tan line at the ankle, and a hard salon light finds all of it. The redness and the polish want opposite treatment in the same frame, which is why a pedi photo rarely improves under one correction applied everywhere.
NailTech is a nail image editor, so the skin and the nails get treated as separate things.
- Even out skin tone around the toes without blurring the nails into plastic.
- Correct the colour cast that a warm salon downlight leaves on the polish.
- Reduce shine on the top of the foot and the plate.
- Tidy the background when a towel edge or a cable made it into the corner.
NailTech cannot move the light or lower your knees, which is why the first three steps happen before you open anything.
Standing over a pedi chair puts the lens about three feet above the toes, and at that height the nails you actually did fill roughly a tenth of the frame while the floor fills a third.
Make your nail photos look salon-ready
Download NailTech and clean up the lighting, skin tone and background on every set you post, in a few taps.
Download on App StoreFrequently Asked Questions
How do you take good pedicure photos?
Take good pedicure photos by getting the lens level with the top of the foot instead of shooting from standing, turning the foot 20 to 30 degrees across the frame, and using soft side light rather than the overhead spot. Crop at the ankle and put a plain mid-tone towel under the heel.
What angle is best for photographing toenails?
The best angle for toenails is a front three-quarter view taken at foot height. Straight-on from the toes makes the foot look stubby, and a pure side view hides four nails behind the big toe. A three-quarter turn shows every nail plate and the line of the foot together.
Why do my pedicure photos look dark?
Pedicure photos look dark because overhead salon downlights strike the shin and the top of the foot while the toenails, which slope away from the ceiling, fall into shadow. Moving one soft light to the side at foot height puts the brightest part of the frame on the nail plates instead.
Do you use cuticle oil before photographing a pedicure?
Cuticle oil should go on after photographing a pedicure. Oiled skin under a salon light produces hot spots across the top of the foot and around the toes, and feet already carry more shine-prone dry skin than hands. Dust off, wipe the sidewalls, shoot, then oil.
Final Takeaways
- Get down to foot height or raise the foot to you. Standing over it is the whole problem.
- Turn the foot across the frame at roughly 20 to 30 degrees.
- Kill the overhead spot and bring one soft light in from the side.
- Crop at the ankle and put a plain mid-tone towel under the heel.
- Shoot both feet, then one close, so the art actually reads.
- Oil after the photo, because feet shine more than hands do.

Hannah
Hannah is a co-founder of NailTech, the nail image editor that turns quick phone shots into portfolio photos. She worked in the beauty industry before moving into mobile design, and now owns product and design on the app.



