How to Edit Nail Photos in Lightroom Mobile
Quick answer: In Lightroom Mobile, edit nail photos in this order: White Balance first to remove the salon yellow, then Exposure, then a small Vibrance nudge instead of Saturation. Use a Brush mask on the nails so the colour correction never touches the client's skin. Copy the settings to the rest of the set.
Lightroom Mobile is free and it is genuinely powerful. It was also designed for photographers grading landscapes and portraits on a tablet, which is not quite what you are doing at eleven at night with forty photos of somebody's hands.
That mismatch is why so many techs download it, spend forty minutes on one photo, and quietly go back to the stock gallery app the following week.
Is Lightroom Mobile free?
The app is free and the free tier does most of what a nail photo needs. Adobe gives you white balance, exposure, contrast, the tone curve, colour mix, and healing on mobile without paying anything, and according to Photutorial the paid Lightroom plan moved to $14.99 a month for new subscribers in March 2026, with masking and Generative Remove sitting behind it.
That masking paywall matters more for nails than for almost any other subject. The whole difficulty with a nail photo is that the nail and the hand need opposite corrections, and separating them is exactly what masks do.
You can work around it. The Colour Mix panel is free, and for a strongly coloured set it targets the nail reasonably well without any selection at all.
What order should you edit a nail photo in?
Colour before brightness, always, and both before anything decorative.
Start in the Colour panel with Temperature. Salon bulbs push everything warm, so a set that looked cool grey on the desk arrives on your phone as beige. Drag Temperature down until something you know is neutral in the frame, a white towel or a sheet of paper, actually reads white. Do not judge this by the nails, because you have been staring at them for two hours and your eye has adjusted.
Tint comes next and usually needs less. Overhead LED strips lean green, so a small push toward magenta cleans up a nude set that looks slightly sickly.
Then Exposure. Nail shots are often a little dark, because the phone metered for a bright top coat reflection and protected it. A lift of half a stop is common. Watch the free edge as you drag, because that is where the photo will blow out first.
Contrast last, and gently. Every glossy finish already has strong bright and dark areas built into it, and the slider exaggerates them faster than you expect.
Vibrance rather than Saturation
Saturation raises every colour by the same amount, and the largest colour area in a nail photo is skin. Push it and the nails improve slightly while the hand turns orange.
Vibrance protects tones that are already strong and lifts the weaker ones, which is closer to what a nude or pastel set needs. Even then, small numbers. Anything past about +15 starts to look like a filter.
How do you edit only the nails and not the hand?
This is the whole game, and Lightroom gives you two routes.
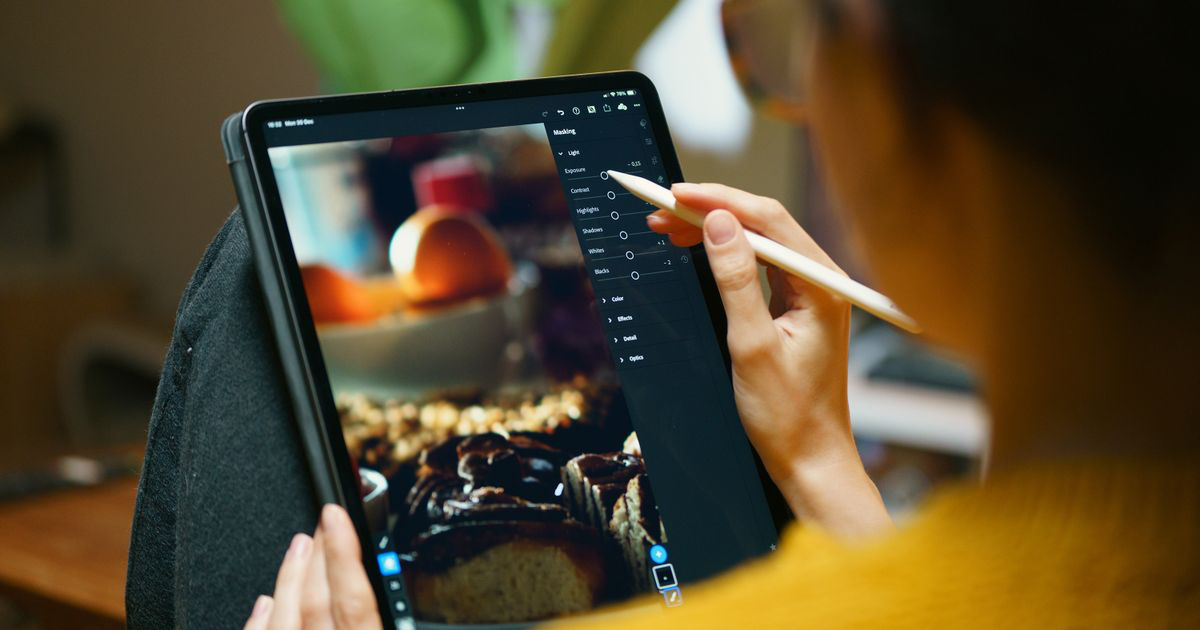
If you have the subscription, use masking. Add a Brush mask, paint over the ten nails at a small brush size with feathering around 50, and every slider you move afterwards applies to that painted area alone. You can now warm the skin and cool the gel in the same photo, which is impossible with global sliders. Painting ten nails takes about ninety seconds the first time and forty once you are used to it.
On the free tier you have Colour Mix instead. Open Colour, tap the mix icon, and pick the hue band your set actually lives in. A red set responds to the Red and Orange bands, but so does skin, so drop to the specific band the polish sits in and adjust Luminance and Saturation there rather than Hue. This works well on saturated colours and poorly on nudes, because a nude gel and a hand occupy nearly the same part of the colour wheel.
For nudes on the free tier, accept a compromise: get the white balance genuinely neutral, leave saturation alone, and let both the nail and the skin be slightly less punchy than you would like. That reads as honest. A pushed nude reads as a filter.
What about Lightroom's presets?
Presets are a starting point and a trap in equal measure.
A preset is a saved set of slider positions, and those positions were chosen for the lighting in someone else's photo. Loaded onto your salon shot, a warm film preset stacks warmth onto a file that already has too much of it. The Amount slider that appears after you apply a preset is the most useful control in the panel, because dropping a preset to 40 percent usually gets you the look without the damage.
Where presets genuinely earn their place is your own. Once you have corrected one photo from a given appointment, save those settings as a preset named after the room and the time of day, and the next set shot in that corner starts most of the way home.
How does Lightroom Mobile compare to the alternatives?
| Tool | Time per nail photo | Masks the nail separately | Colour accuracy on gel | Cost |
|---|---|---|---|---|
| Stock Photos or Gallery app | Under a minute | No | Fair, no white balance eyedropper | Free |
| Snapseed | 2 to 3 minutes | Yes, via control points | Good, has a white balance picker | Free |
| Lightroom Mobile free tier | 3 to 5 minutes | No, Colour Mix only | Very good on strong colours | Free |
| Lightroom Mobile premium | 3 to 5 minutes | Yes, brush and AI masks | Excellent | About $15 a month |
| NailTech | About a minute | Yes, handled for you | Tuned for nail finishes | Low |
Lightroom wins on control and loses on time. If you enjoy editing and post two or three sets a week, the free tier plus Colour Mix is a strong, genuinely free setup. If you photograph six clients a day, the maths stops working, because five minutes a photo across a full week is most of an evening.
What does Lightroom do badly for nail photos?
None of what follows is a bug. It is what happens when a photographer's tool meets a two-centimetre subject.
The export step is the quiet time sink. A Lightroom edit lives inside Lightroom until you export it, pick a size, and save it back to the camera roll, where it lands among the originals and has to be found again before you can post it.
The interface is also built for a photo where the subject is large. You will be pinching to 400 percent to check whether the cuticle line survived a sharpening move, then pinching back out, on a screen the size of a playing card.
And the app has no idea what it is looking at. Nothing in Lightroom knows that the two centimetres of the frame you care about are the nails, so every judgement about how far to push a slider is yours to make, in a room still lit by the bulb that caused the problem.
Backgrounds are the clearest gap. Lightroom has no one-tap cutout, so a cluttered desk means brushing a mask by hand, and PhotoRoom's background cutout does in a tap what Lightroom asks you to paint in.
A five-minute Lightroom Mobile routine for one set
- Fix Temperature against something white in the frame before you touch any other slider.
- Nudge Tint toward magenta if the overheads left a green cast on the skin.
- Lift Exposure a little, stopping before the free edge or the top coat highlight goes pure white.
- Brush a mask over the ten nails and adjust colour there, or use Colour Mix on the polish's hue band if you are on the free tier.
- Copy the settings and paste them onto the remaining photos from that appointment, then export at full size.
Where NailTech fits in
A Lightroom edit lives inside Lightroom. Before a corrected photo becomes a post it has to be exported at the right size, saved back to the camera roll, and picked out again from the originals sitting either side of it, and that round trip is where a lot of techs quietly lose twenty minutes a week. Add the ninety seconds of brushing a mask around ten nails and you have an editing session rather than an edit.
NailTech is a nail image editor that already knows the nails are the subject.
- Separates the nail from the hand without you painting a mask.
- Neutralises salon warmth on the gel while leaving the skin its own colour.
- Keeps the finish intact, so chrome stays metallic and glitter stays sparkly.
- Applies the same correction across a set in one pass.
- Finishes in the camera roll, with no export size to choose.
NailTech is a phone editor for nail photos, not a raw workflow. If you shoot in raw and grade for a living, Lightroom is the better tool and always will be.
Lightroom will give you a better nail photo than almost anything else on a phone. It will also ask you for five minutes and a brush mask around ten nails, and the honest question is whether you have that twice a day.
Make your nail photos look salon-ready
Download NailTech and clean up the lighting, skin tone and background on every set you post, in a few taps.
Download on App StoreFrequently Asked Questions
Is Lightroom Mobile good for nail photos?
Lightroom Mobile is good for nail photos and gives more colour control than any other free phone app, particularly its white balance and Colour Mix panels. The drawback is speed: a careful nail edit with a brush mask takes three to five minutes, and masking sits behind Adobe's paid subscription rather than the free tier.
Is Lightroom Mobile free for editing nail photos?
Lightroom Mobile is free to download and its free tier covers white balance, exposure, contrast, tone curve and Colour Mix, which is enough to correct most nail photos. Masking, healing and Generative Remove require the paid Lightroom plan, which Adobe moved to $14.99 a month for new subscribers in March 2026.
What Lightroom settings work best for nail photos?
The best Lightroom settings for nail photos start with Temperature pulled cooler until a white towel in the frame reads neutral, then Exposure lifted slightly, then Vibrance raised no more than about 15 rather than Saturation. Contrast should stay low, since glossy top coat already creates strong highlights of its own.
Should nail techs use Lightroom presets?
Nail techs should treat Lightroom presets as a starting point, not a finish, because a preset applies settings chosen for someone else's lighting. Dropping the preset Amount slider to around 40 percent avoids stacking extra warmth onto an already yellow salon photo. Saving your own preset from a corrected photo is far more useful.
Is Lightroom or Snapseed better for nail photos?
Snapseed is faster and its Selective control points let you adjust individual nails for free, while Lightroom Mobile offers deeper colour control through Colour Mix and the tone curve. For a nail tech editing between clients, Snapseed usually finishes sooner. For a carefully graded portfolio image, Lightroom holds up better.
Final Takeaways
- White balance before everything else. Salon bulbs are the root cause of most bad nail photos.
- Vibrance, not Saturation, because skin is the biggest colour area in the frame.
- Masking is the feature that matters and it is the one Adobe charges for.
- Colour Mix is the free workaround and it works on strong colours, not nudes.
- Cut every preset to about 40 percent before deciding whether it helped.
- Count the export step when you work out how long a Lightroom edit really takes.
The general order behind all of this is in editing nail photos on your phone, and the best nail photo editing apps compares the wider field. If you are on Android, editing nail photos on Android covers the Snapseed route in detail.

Hannah
Hannah is a co-founder of NailTech, the nail image editor that turns quick phone shots into portfolio photos. She worked in the beauty industry before moving into mobile design, and now owns product and design on the app.