
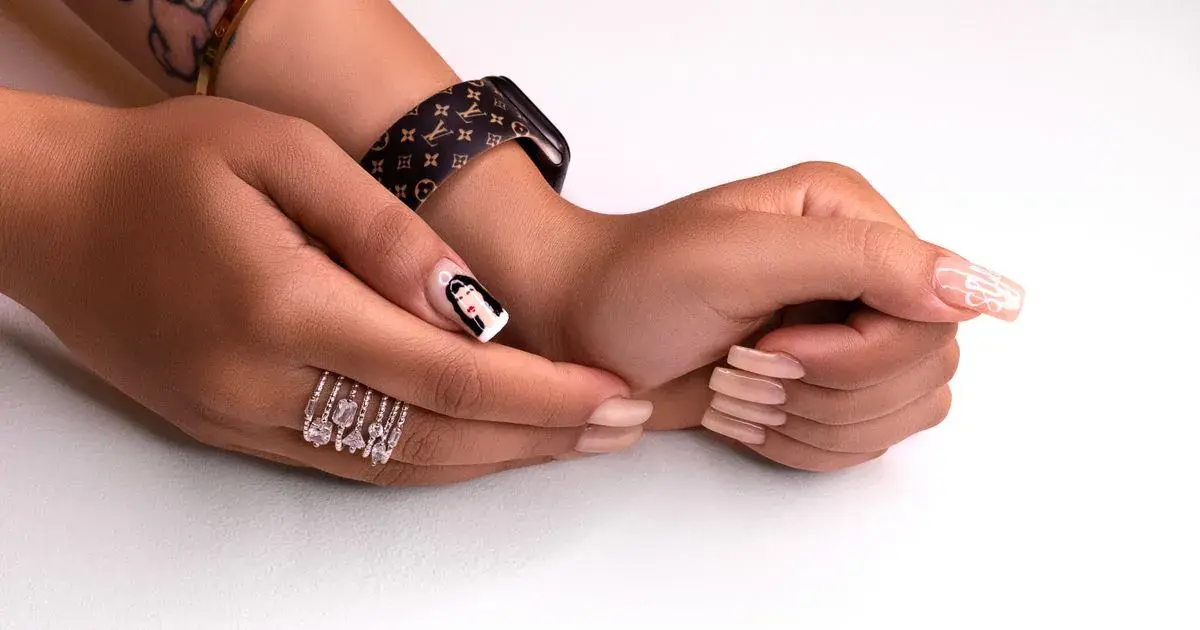
Photoroom for Nail Photos: Is the Cutout Worth It?
Quick answer: Photoroom removes backgrounds from nail photos quickly and cleanly, which suits price graphics and product shots. It is a poor fit for portfolio work, because cut-out edges look artificial around long tips, and Photoroom's free accounts are licensed for personal use only, so posting the results to a salon account is not covered.
Somebody in a nail group recommended it, so you tried it on that beautiful almond set with a cluttered desk behind it. One tap and the mess was gone. The hand was floating on white.
And then you looked at the tips.
What does Photoroom actually do?
Photoroom is a background tool first and an editor second. Its core trick is separating a subject from everything behind it, then letting you drop that subject onto white, a colour, a gradient or a studio-style backdrop. It was built for people selling things: a shoe on a white background, a candle on a marble shelf, a resale listing that needs to look like a shop.
That heritage explains both its strength and its limits. It is very good at objects with clean, closed outlines. A hand is not that. A hand has hair, translucent skin at the edges, gaps between fingers, and five thin nail tips sticking out into the exact part of the frame the tool finds hardest.
How well does Photoroom cut out a hand?
Better than most, and not well enough for a portfolio shot.
On a short, rounded set with the fingers slightly apart, the result is usually convincing. The tool follows the knuckles accurately, keeps the gaps between fingers, and gives you a usable subject in a couple of seconds.
Push it toward the work you actually want to show off and it starts making mistakes in the worst places:
- Long stiletto and coffin tips get shortened, because the algorithm reads a thin pale point against a pale background as an edge artefact and trims it.
- French smile lines confuse it when the free edge is white and the surface behind is also white.
- Negative space designs get filled in, since the tool has decided the gap in the middle of your nail art is part of the background.
- Loose hair or a sleeve cuff near the wrist leaves a scrappy, chewed-looking edge.
You can repair all of that with the manual brush, which is genuinely well built and lets you paint areas back in at a decent zoom. It takes a couple of minutes per photo. That is fine for one image and unrealistic for a set of eight.
Why a cutout rarely helps a portfolio shot
There is a bigger issue than edge accuracy. A hand floating on pure white does not read as a photograph of nails. It reads as a graphic. The shadow that told the viewer the nails have shape and thickness is gone, the apex flattens out, and a beautiful gel set ends up looking like a stock illustration of nails.
Most of the time the real problem is not the background existing, it is the background being messy. That is usually better solved by tidying or blurring than by deleting, and the trade-offs are set out properly in removing the background from nail photos.
What does Photoroom cost, and can you use it for business?
This is the part worth reading twice.
Photoroom has a free tier with a monthly export limit and restricted access to the AI features. But its help centre is explicit that free accounts are licensed for personal use only: Photoroom's own documentation on free accounts and commercial use states that free accounts grant a licence "for your own personal, non-commercial purposes."
A nail tech posting edited photos to a business account, to attract bookings, is commercial use. That is not a grey area or a technicality nobody enforces; it is the terms you agreed to. If Photoroom is going to be part of your posting workflow, it needs to be a paid plan. Photoroom's pricing page lists Pro, Max and Ultra tiers, cheapest billed annually.
Plenty of nail techs are using the free tier for exactly this without realising. Worth checking your own situation.
When is Photoroom the right tool?
There are three jobs where it genuinely earns a place.
Press-on listings are the strongest case. If you sell sets, a clean white background is what marketplaces expect, and this is precisely the job Photoroom was designed for. A set on a card, cut out and placed on white, comes out looking professional in seconds.
Price and service graphics are the second. A cut-out hand sitting on your brand colour, with the price list beside it, looks deliberate in a way a snapshot never does.
Then there is straightforward retail product photography: cuticle oil, your own branded polish, a gift box. All objects, all closed outlines, all exactly what the tool was built for.
Notice that none of those is a photo of a fresh set on a client. That is the line.
How does Photoroom compare for nail work?
| Tool | Cutout quality on hands | Colour correction | Best use | Cost |
|---|---|---|---|---|
| Photoroom | Good, weak on long tips | Minimal | Product and press-on listings | Free tier is personal use only |
| Canva Background Remover | Fair | Basic sliders | Graphics you are already designing | Paid plan |
| Picsart | Fair, trims tips | Buried but present | Collages and stickers | Free with ads, paid tiers |
| Snapseed | No cutout tool | Very good, selective | Free colour work on real photos | Free |
| NailTech | Cleans and calms the background | Tuned for nail shades and skin | Portfolio and grid photos | App purchase |
The row that matters is the last two. For an actual portfolio photo, you almost never want the background removed. You want it quiet.
A five-step Photoroom routine for product shots
- Shoot on a plain surface with the set well separated from anything behind it, which does most of the tool's work for it.
- Run the cutout, then zoom to 100% on the tips before you accept it.
- Brush back anything it ate, especially free edges, negative space and the outline of any 3D charm.
- Choose a plain background rather than a fake studio scene, since fake shadows and real nails rarely agree.
- Check your plan before this goes on a business account, because the free tier does not license commercial use.
Where NailTech fits in
A cutout is a decision about edges, and a nail set is almost entirely edges: five free edges, ten sidewalls, a cuticle line, and whatever your nail art is doing in between. Any tool that draws a hard boundary around all that is going to get some of it wrong, and the parts it gets wrong are the parts you spent an hour perfecting. Most nail photos never needed the background gone anyway. They needed it to stop competing with the hand.
NailTech is a nail image editor, and it treats the background as something to calm rather than delete.
- Quiets the desk clutter without cutting your tips off.
- Neutralises the bulb so the shade matches the bottle.
- Keeps skin looking like skin while the gel gets corrected.
- Handles a whole set together, so both hands and the close-ups match.
NailTech is a phone editor for nail photos, not a product listing tool. If you are photographing press-on sets for a shop, Photoroom on a paid plan is the better fit and worth the subscription.
A hand on pure white stops looking like a photograph of nails and starts looking like a diagram of them. The shadow you deleted was the thing telling everyone the apex had height.
Make your nail photos look salon-ready
Open NailTech and clean up the lighting, skin tone and background on every set you post, in a few taps.
Open NailTechFrequently Asked Questions
Is Photoroom good for nail photos?
Photoroom is good for nail product photos, such as press-on sets and retail items that need a clean white background. Photoroom is a weaker choice for portfolio shots of a client's manicure, because its cutout tool trims long tips and negative space, and a hand on pure white loses the shadow that gives the nails depth.
Can nail techs use Photoroom for free?
Nail techs cannot use a free Photoroom account for business content. Photoroom's help centre states that free accounts are licensed for personal, non-commercial purposes only, and posting edited photos to a salon account to attract bookings is commercial use. A paid Photoroom plan is required for that.
Does Photoroom cut off long nail tips?
Photoroom often trims long stiletto and coffin tips, because a thin pale point against a pale background reads to the tool as an edge artefact rather than part of the subject. Photoroom's manual brush can paint the tips back in, which takes roughly a minute per photo and is impractical across a full set.
Should you remove the background from a nail photo?
You should usually not remove the background from a portfolio nail photo. Deleting it removes the shadow that shows nail thickness and apex height, so the set looks flat and graphic. A cluttered background is better cropped, tidied or blurred. Full background removal suits price graphics and product listings instead.
What is the best way to fix a messy background behind a nail photo?
The best fix for a messy background behind a nail photo is to crop tighter first, then darken or soften whatever remains so it stops competing with the hand. Removing objects individually keeps the surface and shadow intact, which preserves the sense of depth that a full cutout destroys.
Final Takeaways
- Photoroom is a product tool, and press-on listings are where it shines for nail techs.
- Check the licence. Free accounts are personal use only, which rules out business posts.
- Zoom to the tips before accepting any cutout, because that is where it fails.
- Cut-out hands look graphic, not photographic, once the shadow disappears.
- Quiet beats deleted for a portfolio shot. Crop, soften, and keep the surface.
- Correct the colour separately, because background removal does nothing about a yellow bulb.

Hannah
Hannah is a co-founder of NailTech, the nail image editor that turns quick phone shots into portfolio photos. She worked in the beauty industry before moving into mobile design, and now owns product and design on the app.



