
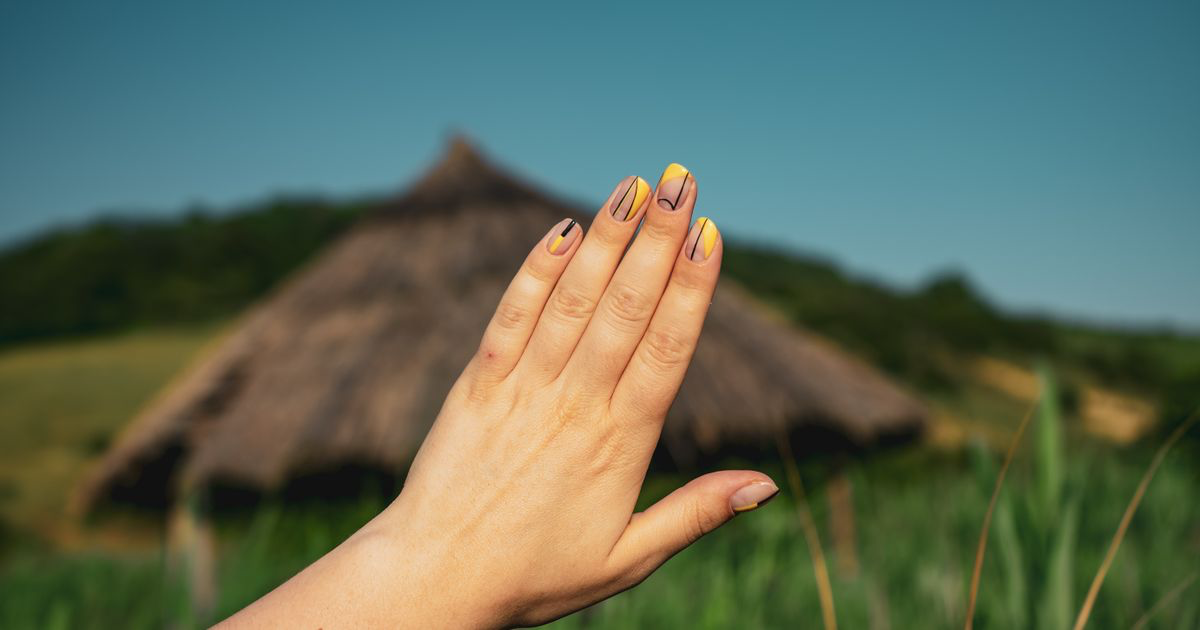
How to Photograph Short Nails
Quick answer: Photograph short nails from a low angle, roughly level with the fingertips, with the fingers pointing away from the lens and slightly curled. Fill the frame with two or three nails rather than the whole hand, use soft window light, and crop tight so there is less skin around each nail for the eye to compare it against.
A neat short set on the desk looks crisp. Clean cuticle line, tidy sidewalls, even colour, nothing hanging over the free edge. Then the photo loads and the nails have almost vanished into the fingers.
Why do short nails look worse in photos than in real life?
A photo removes the two things your eye uses to judge a nail: depth and movement.
When a client holds their hand up, you see the nail from several angles in a second and your brain builds the curve, the apex and the thickness of the free edge from all of them. A flat photo gives one angle, and if it looks down at the hand from above, the nail plate compresses into a small oval sitting on a large finger.
Length is relative too. The camera only shows the ratio of nail to finger, and a phone's wide lens exaggerates whatever sits closest. Shoot palm-down from over the top and the knuckles are nearest the lens, which makes them bigger and the nails smaller in the same frame.
A related problem is covered in why do my nails look short in photos: that article is about long sets photographing short, this one about short sets photographing well as short sets.
What angle flatters a short set?
Low, from past the fingertips. Drop the phone until the lens is roughly level with the nails. From that height the plate is seen closer to edge on, so its full length from cuticle to free edge is in frame rather than foreshortened into a stub. Around 30 to 45 degrees from the plane of the nail is the sweet spot, covered in best angle for nail photos.
Then have the client point the fingers away from you rather than across the frame. Fingers travelling away from the lens shrink along their length, and since the nail sits at the far end, the finger loses more apparent size than the nail.
Do not shoot straight down on a flat hand. It is the easiest position to ask for and the worst angle for a short set.
Should the fingers be curled or straight?
Curled, gently. A soft curl brings the nails forward and the knuckles back, which is the ratio you want, and it puts a little shadow under the free edge that tells a viewer the nail has thickness. Straight, splayed fingers flatten everything into one plane.
The pose detail sits in how to pose hands for nail photos. For short work, the loose fist with index and middle relaxed forward is the most reliable.
Should you fill the frame or show the whole hand?
Fill the frame with two or three nails. A five-nail hero shot on a short set gives the eye a lot of skin and not much colour. Move in until two or three nails carry the frame and the cuticle work becomes the subject.
Take the wider hand shot too, because clients want to see how a set sits on a real hand, but do not lead a carousel with it.
Get close on the 2x lens rather than pushing the wide lens up to the hand. At close range the wide lens curves what is near the frame edge, and a bowed sidewall on a small nail reads as sloppy work.
Does the background change how long a nail looks?
Yes, more than most people expect. Contrast at the free edge is what defines where the nail stops. Photograph a pale nude short set against a white desk and the tip dissolves into the background, so the nail visually ends wherever the eye can still see a difference. Against a mid-tone grey or muted olive, the whole nail is visible to its edge.
Pick a background a few steps away from the polish in brightness, without going so dark the hand looks like a cut-out. The full breakdown is in best background for nail photos. Keep it matte and uncluttered, because on a short set a busy background eats a bigger share of the frame.
How do you make short nails look intentional rather than unfinished?
Shoot the details that only look good when the work is good.
A short set has nowhere to hide, so the cuticle line, the sidewalls and the shine of the top coat carry the photo. A tight frame on a clean cuticle and even sidewalls reads as precise rather than plain, which is a selling point for clients who work with their hands or have been told their nails are too short for extensions.
Colour helps too. Deep saturated shades and defined French tips give a short nail a clear boundary. Sheer milky shades often photograph as nothing at all, so lean harder on background contrast.
What is the best way to edit a short set?
Lightly, and with the crop doing most of the work.
| Option | Time per photo | Control over crop | Colour accuracy on gel | Cost |
|---|---|---|---|---|
| Straight out of the phone camera | None | Whatever you shot | Shifts with salon bulbs | Free |
| Instagram or TikTok filters | Seconds | Basic square or 4:5 | Poor, filters push colour | Free |
| Lightroom or Photoshop | 5 to 15 minutes | Total | Excellent | Subscription |
| NailTech on your phone | About a minute | Good, built for nail framing | Built for gel shades | App purchase |
The crop is doing more work on a short set than any slider. Cutting away spare skin and desk raises the proportion of the frame the nails occupy, and that alone changes how the set reads. How to crop nail photos for Instagram covers the ratios that leave you room to do that without losing the tips at the edge of the grid.
A two-minute setup for short sets
- Move to indirect window light and switch the overhead bulbs off.
- Lay a matte mid-tone background down, a few steps from the polish in brightness.
- Ask for a loose curl, fingers pointing away, index and middle relaxed forward.
- Drop the phone to fingertip height on the 2x lens, two or three nails filling the frame.
- Shoot five frames, then one wider hand shot, and check the cuticle line is sharp.
Where NailTech fits in
Short sets need a change of angle far more than better gear, and the angle is free. What the phone will not do is judge the crop or fix the colour your salon bulbs put on a nude gel, and on a short set that decides whether the photo looks deliberate or accidental.
NailTech is a nail image editor that works on the shot you already have.
- Correct salon colour casts so a nude or milky shade stays true instead of turning yellow.
- Crop tight for the grid so the nails, not the desk, fill the frame.
- Even out redness around the cuticle, which shows more on short nails because the skin is a bigger part of the shot.
- Clean up a cluttered background so the free edge has something plain to sit against.
NailTech cannot add length that was never there, and should not: a client who books off a lengthened photo notices at the appointment.
Most short sets photograph badly because of where the phone was held, and a lower angle fixes more of it than any amount of editing.
Make your nail photos look salon-ready
Download NailTech and clean up the lighting, skin tone and background on every set you post, in a few taps.
Download on App StoreFrequently Asked Questions
How do you photograph short nails so they look good?
Photograph short nails from a low angle level with the fingertips, with the fingers curled gently and pointing away from the lens. Fill the frame with two or three nails on the 2x lens, use soft indirect daylight, and choose a background a few steps away in brightness from the polish so the free edge stays visible.
What angle makes short nails look longer?
An angle roughly 30 to 45 degrees from the plane of the nail, taken from past the fingertips, makes short nails look longest. Shooting straight down onto a flat hand foreshortens the nail plate into a small oval, while a lower angle shows the nail closer to edge on and keeps its full length in frame.
What colour polish photographs best on short nails?
Deep saturated shades and defined French tips photograph best on short nails, because a clear boundary between nail and skin gives the eye something to measure. Sheer milky shades are the hardest, since they blend into the fingertip on camera and need a strongly contrasting background to hold their shape.
Can you photograph short bitten nails for a portfolio?
Short bitten nails are worth photographing for a portfolio, particularly as a before and after pair, because clients searching for nail biting help want proof you work with hands like theirs. Match the light, angle and background between the two shots so the difference is the nails and nothing else.
Final Takeaways
- Drop the phone to fingertip height. Shooting down onto a flat hand is what makes a short set disappear.
- Ask for a gentle curl so nails come forward and knuckles go back.
- Fill the frame with two or three nails instead of showing the whole hand.
- Pick a background a few steps from the polish in brightness so the free edge stays defined.
- Shoot the cuticle and sidewalls close up. Precision is what sells a short set.
- Crop tight in the edit. It changes the look of a short nail more than any slider.

Hannah
Hannah is a co-founder of NailTech, the nail image editor that turns quick phone shots into portfolio photos. She worked in the beauty industry before moving into mobile design, and now owns product and design on the app.



