How to Fix Shiny Hands in Nail Photos
Quick answer: Shiny hands in nail photos come from cuticle oil and hand cream reflecting the lamp back at the camera. Blot the hand before you shoot, and in the edit pull down highlights rather than exposure, since exposure darkens the nails too. A small reduction in highlights removes the wet look without making the skin look grey.
The set is finished, the oil is on, the hand looks glossy and healthy across the desk from you. Then the photo comes back and the knuckles have white patches on them, the back of the hand looks damp, and the client's skin reads shiny rather than cared for.
Nothing went wrong with the manicure. The oil you applied thirty seconds ago is doing exactly what oil does.
Why do hands look shiny in nail photos?
Because you finish every set by making the skin reflective, then point a light at it.
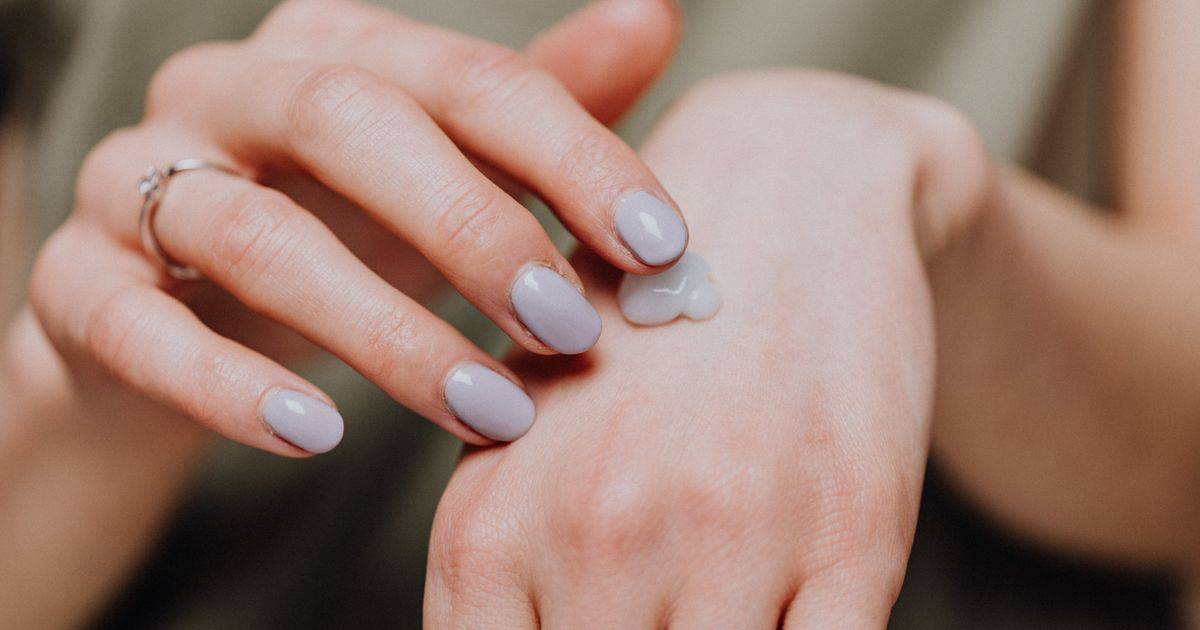
Cuticle oil, hand cream and the residue from a wipe all leave a thin film on the skin, and a film reflects. Under a nail lamp or a ring light, that reflection is a bright copy of the light source spread across the back of the hand and the knuckles.
Skin also has its own shine, especially on the knuckles where it is stretched tight over bone. Add a warm salon bulb overhead and a lamp in front, and the same patch of skin picks up two highlights from two directions.
The camera then makes it worse. Phones expose for the overall frame, and if the brightest thing in that frame is a wet knuckle, everything else gets pulled down to protect it. The nails end up slightly dark and the shine still looks blown out.
Should you fix shine before the photo or after?
Before, if you have ten seconds, because a genuine highlight has no detail left in it to recover.
Blot, do not wipe. Press a tissue or a paper towel gently over the back of the hand and the knuckles and lift it away. Wiping drags oil around and leaves streaks that photograph worse than an even sheen. The cuticle area can keep its oil, since it is small, low down in the frame, and the shine there reads as freshly finished rather than greasy.
Better still, take the photo first and oil afterwards for the client. The set is already cured, so the photo loses nothing, and the client still gets the ritual.
If the shine is coming from your lamp rather than the skin, moving the light matters more than blotting. Angling the light so it comes from the side rather than straight on sends the reflection away from the lens instead of into it, which is the same principle covered in fixing glare on nail photos.
Which slider actually removes shine?
Highlights, not exposure, and not brightness.
Exposure moves the whole image down. Drag it far enough to calm a shiny knuckle and the nails go dark, the background goes muddy, and you have swapped one problem for a worse one.
Highlights work only on the brightest parts of the frame. Pull them down and the wet patches on the skin come back toward the tone of the surrounding hand while the mid-tones, which is where most of the nail lives, barely move.
Whites is the neighbouring control and it does something similar but harder, clipping the very top of the range. Use it after Highlights if the reflection is still pure white, and in small amounts.
When shine cannot be recovered
There is a point past which the pixel is simply white. No detail was recorded, so pulling highlights down turns that patch grey rather than skin-coloured, and a grey knuckle looks stranger than a shiny one.
You can usually tell by dragging Highlights to the bottom for a second. If the bright patch becomes flat grey with no texture, it was clipped, and the honest move is to accept a little shine, crop the worst patch out of the frame, or reshoot.
Does removing shine make the hand look fake?
It can, and the tell is texture.
Most people reach for a skin smoothing or blemish tool, which removes the shine by removing everything else too: pores, knuckle creases, the fine lines that make a hand look like a hand. What is left is a smooth beige shape holding a set of nails, and it reads immediately as edited.
Tone down the brightness of the shine and keep the texture. A knuckle should still have creases. The back of the hand should still have a visible surface.
There is also a fairness question. Clients look at their own hands, and a post where the skin has been polished to plastic sets an expectation nobody's hands meet, including theirs. How much editing is too much works through where that line sits.
What actually helps with shiny hands?
| Approach | Time | Keeps skin texture | Affects the nails | Best for |
|---|---|---|---|---|
| Blotting before the shot | 10 seconds | Yes | No | Every set, always the first choice |
| Moving the lamp off-axis | 15 seconds | Yes | Removes nail glare too | Ring lights and lamps pointed straight on |
| Lowering Highlights in editing | 20 seconds | Yes | Very little | Mild to moderate shine |
| Lowering Exposure | 5 seconds | Yes | Darkens the nails badly | Almost never |
| Skin smoothing or blur tools | 30 seconds | No | No | Rarely, and never at full strength |
The first two rows cost you almost nothing and solve the problem properly. The editing rows are what you use when the client has already gone.
What about oil on the nails themselves?
That shine is often worth keeping.
A glossy top coat is meant to reflect, and a photo of gel with no reflection at all looks matte and slightly dead. The difference between a good highlight and a bad one is size and edge: a soft, elongated shine down the apex looks like gloss, and a hard white blob across the middle of a nail looks like a mistake.
So when you pull highlights down, watch the nails as well as the skin. If the gel loses all its shine, you have gone too far, and the fix is to lift it back a step and accept slightly brighter knuckles.
Oily fingerprints on the plate are a separate job. They sit on the surface as smears, and they respond better to being wiped before the photo than to any slider, which is covered along with the rest of the pre-shot routine in prepping nails for photos.
A thirty-second fix for a shiny hand
- Blot the back of the hand and the knuckles with a tissue before the photo, leaving the cuticle oil alone.
- Move the lamp to one side so its reflection leaves the frame instead of landing on the skin.
- In editing, drag Highlights down until the bright patches rejoin the tone of the hand.
- Check the nails kept their shine, and back off a step if the gel has gone flat.
- Leave the smoothing tools alone, so the knuckle creases and pores survive.
Where NailTech fits in
Oil is the last thing you put on a set and the first thing that ruins the photo of it, which puts the shine problem in an awkward place: it is created by doing your job properly, and it lands on skin rather than on the nails you actually want to correct. Pulling the whole photo down to calm a knuckle takes the gel down with it.
NailTech is a nail image editor that treats the hand and the nails as separate surfaces.
- Calms reflective patches on skin without dropping the nails into shadow.
- Keeps pores and knuckle creases, so the hand still looks real.
- Protects the gloss on the top coat, which is the shine worth keeping.
- Evens skin tone left blotchy by mixed salon lighting.
- Repeats the same treatment across every photo from the appointment.
NailTech is a phone editor for nail photos, not a retoucher that will rebuild a knuckle. Where a highlight has clipped to pure white, no editor recovers what the sensor never recorded.
A shiny knuckle and a glossy top coat are the same physics, and most editing advice removes both. Keep the reflection on the gel, lose the one on the skin, and the photo stops looking damp.
Make your nail photos look salon-ready
Download NailTech and clean up the lighting, skin tone and background on every set you post, in a few taps.
Download on App StoreFrequently Asked Questions
How do you get rid of shiny hands in nail photos?
Get rid of shiny hands in nail photos by blotting the back of the hand and knuckles with a tissue before shooting, then lowering the Highlights slider in editing rather than Exposure. Highlights affects only the brightest parts of the frame, so the shine on the skin comes down while the nails keep their brightness and detail.
Why do hands look greasy in nail photos?
Hands look greasy in nail photos because cuticle oil and hand cream leave a reflective film on the skin, and a nail lamp or ring light bounces off that film straight into the lens. Knuckles show it worst, since the skin there is stretched tight and already catches light from more than one direction.
Should you put cuticle oil on before taking nail photos?
Apply cuticle oil after the photo rather than before. The cured set looks identical either way, and oil on the back of the hand creates bright reflective patches that no slider fully recovers. A small amount left in the cuticle area is fine, since it reads as freshly finished rather than greasy.
Does lowering exposure fix shiny skin in photos?
Lowering exposure is a poor fix for shiny skin because it darkens the entire photo, including the nails that are the subject. The Highlights slider targets only the brightest areas, so it brings a shiny knuckle back toward the tone of the surrounding hand while leaving the mid-tones of the nail plate almost untouched.
Is it okay to smooth skin in nail photos?
Light smoothing is acceptable, but skin smoothing tools remove pores, knuckle creases and fine lines along with the shine, which makes a hand look plastic. Reducing the brightness of the reflection while keeping the skin texture gives a cleaner result and sets an expectation a real client's hands can actually meet.
Final Takeaways
- Blot before you shoot, and oil the client after the photo.
- Angle the lamp off to one side so the reflection misses the lens.
- Highlights, not Exposure, is the slider that fixes shine.
- Keep the gloss on the gel while you take it off the skin.
- Preserve skin texture, because smoothed hands read as fake instantly.
- Accept a little shine where the highlight has clipped to pure white.
The broader routine sits in editing nail photos on your phone, and correcting skin tone in nail photos handles the colour half of making a hand look right.

Hannah
Hannah is a co-founder of NailTech, the nail image editor that turns quick phone shots into portfolio photos. She worked in the beauty industry before moving into mobile design, and now owns product and design on the app.