
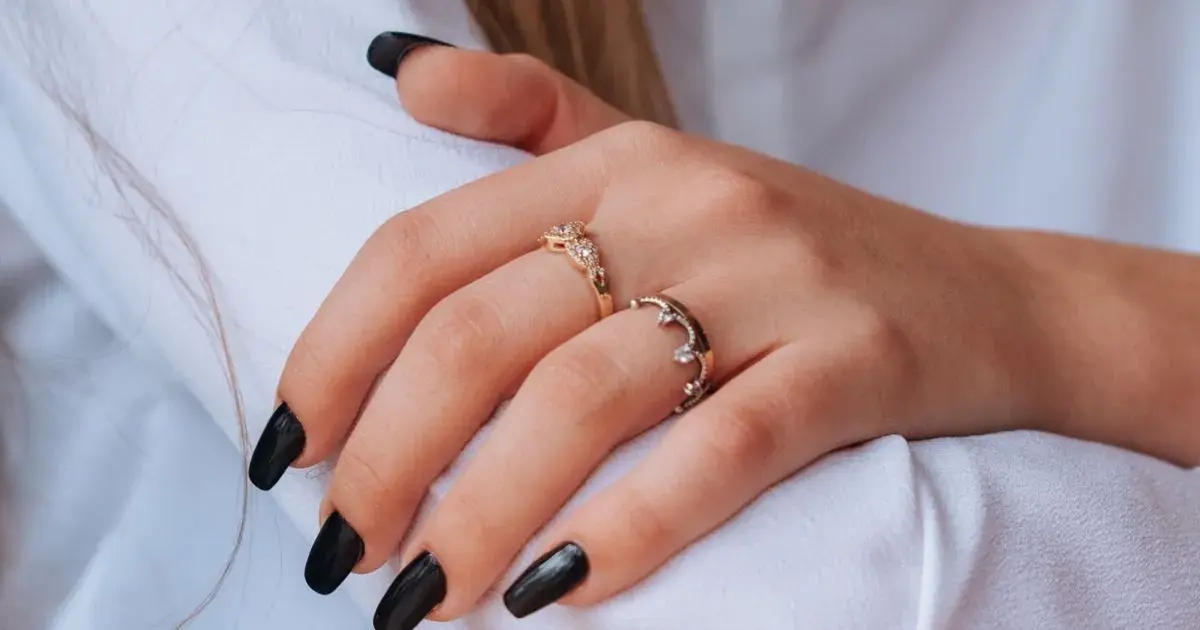
How to Edit Black Nail Photos
Quick answer: Edit black nail photos by lifting shadows only slightly, correcting the colour cast so the black reads neutral rather than brown or blue, and controlling the glare stripe on the top coat. Avoid raising brightness or contrast, which turns black gel grey and buries the free edge.
A black set is the one that looks incredible in the chair and then arrives on your phone as a dark smear with a white streak down the middle of every nail. You cannot tell where one nail ends and the next begins. The stiletto tips have merged into the shadow behind them.
Nearly all of that is an editing problem, and most people fix it in exactly the wrong direction.
Why do black nails photograph badly?
Black gel does not reflect much light, so it gives your camera almost nothing to record. What it does reflect, it reflects like a mirror: the top coat throws back a hard, bright copy of whatever light source is above you, which is why there is a white bar across all five nails.
So the file you end up with is two extremes with nothing in between. Very dark nail, very bright stripe, and the shape of the nail hiding somewhere in the gap.
There is a third thing going on that you cannot see yet. In a dim salon your phone raised its sensitivity to cope, and that sensitivity produces noise, which lives mostly in the darkest parts of the image. Your black nails are the darkest part of the image. Lift those shadows and the noise arrives with them, which is why a black set often looks worse the more you brighten it. The wider version of that problem is in why nail photos look grainy.
Should you brighten a black nail photo?
Barely, and never with the brightness or exposure slider.
Exposure lifts everything, including the glare stripe that was already too bright, so you end up with grey nails and a blown-out streak. What you want instead is the shadows slider, which affects only the darkest areas and leaves the highlights alone.
Even then, go small. A little lift separates the nails from the background and brings back the sidewalls. A lot of lift turns the gel from black to charcoal, and charcoal is not what the client booked.
The test is the free edge. Zoom in on the tip of the longest nail against whatever is behind it. If you can see where the nail stops, you have lifted enough. Keep going past that and you are only adding noise.
How do you fix the glare stripe?
Pull highlights down first, and accept that some glare is meant to be there.
A gloss top coat is supposed to look glossy, and a black set with no reflection at all reads as matte or, worse, as flat plastic. What you are removing is the part of the reflection that has gone pure white and lost all detail, not the reflection itself.
Drop the highlight slider until the stripe has tone in it again, some grey rather than blank white. If it is still a hard bar, the glare was burned in at the shooting stage and there is nothing recorded underneath it to recover. That is the honest limit, and the full explanation of where it sits is in fixing glare on nail photos.
Matte black is a different job
If the set has a matte top coat, there is no glare to fix and the opposite problem appears: the nails go completely featureless, a black shape with no edges.
Here, texture or clarity does more than any brightness slider. A small amount brings back the slightly powdery surface of a matte finish and redraws the boundary between adjacent nails. It is the one case where a black set benefits from added definition. There is more on this in editing matte nail photos.
How do you stop black looking brown or blue?
Black is a colour, and it picks up whatever the room is doing.
Under a warm salon bulb, black gel photographs slightly brown, which makes an expensive set look like an old chipped one. Under a cool ring light or a north-facing window, the same set goes navy blue. Neither looks like the bottle.
Correct it the same way you would any cast, by judging the skin rather than the nails. Pull temperature until the client's hand looks like a hand. Because black holds so little colour information, it is genuinely hard to judge directly, so the skin is not just the better reference here, it is the only usable one.
Watch out for one more thing: raising saturation on a black set does nothing to the nails, because there is no pigment to boost, but it does turn the client's hands orange. Leave it alone.
How do the options compare on a black set?
| Approach | What it does to black gel | Noise in the shadows | Glare control | Time |
|---|---|---|---|---|
| Auto-enhance | Lifts the whole image, black goes grey | Amplified | None | Instant |
| Instagram filters | Adds a cast to an already ambiguous colour | Usually worse | None | Seconds |
| Snapseed or Lightroom Mobile | Full shadow and highlight control | Manageable with the noise slider | Good | 4 to 8 minutes |
| NailTech | Keeps black as black | Handled without smearing | Calmed, not erased | About a minute |
Auto-enhance is the worst option on the list specifically for black, because every automatic algorithm reads a large dark area as an underexposed mistake and sets about correcting it.
A four-step edit for a black set
- Fix the cast first, using the client's skin to judge temperature, so you are not editing brightness on a brown or blue version of black.
- Lift shadows a little, stopping the moment the free edge separates from the background.
- Pull highlights down until the glare stripe has grey in it rather than pure white.
- Add a touch of texture if the set is matte, or leave it alone if the top coat is gloss and already showing definition.
Where NailTech fits in
Every automatic correction ever written treats a large black area as a mistake. Auto-enhance sees a black set and decides the photo is underexposed, so it lifts the whole thing, and the gel that was worth eighty pounds arrives on your grid as grey with a white bar through it. Undo that by hand and you are lifting shadows without lifting the glare, correcting a cast on a colour that shows you almost no colour, and then repeating both judgements identically on the second hand.
NailTech is a nail image editor, and it treats a black set as a black set rather than as a photo that went wrong.
- Keeps black black, instead of lifting it into charcoal.
- Reads the skin to neutralise the bulb, since the gel gives nothing away.
- Calms the glare bar while leaving the gloss the client paid for.
- Handles the shadow noise without smearing the sidewalls.
- Matches both hands so a set posts as one set.
NailTech is a phone editor for nail photos, not a light source. If the glare bar was pure white when you took it, the detail underneath was never recorded and nothing brings it back.
Every auto-enhance in the world looks at a black set and concludes the photo is underexposed. The correction it applies is the exact opposite of what black gel needs.
Make your nail photos look salon-ready
Open NailTech and clean up the lighting, skin tone and background on every set you post, in a few taps.
Open NailTechFrequently Asked Questions
Why do my black nail photos look grey?
Black nail photos look grey when the brightness or exposure slider was raised, or when auto-enhance decided the dark area was underexposed and lifted it. Black gel needs the shadow slider instead, moved only far enough to separate the free edge from the background. Anything more turns the gel charcoal.
How do you get rid of the shine stripe on black nails?
Reduce the shine stripe on black nails by pulling the highlight slider down until the stripe holds grey tone rather than pure white. Some reflection should stay, because a gloss top coat is meant to look glossy. If the stripe is completely blank white, the detail was never recorded and cannot be recovered.
Why do black nails look brown in photos?
Black nails look brown in photos because a warm salon bulb tints every colour in the frame, and black holds so little pigment that the tint dominates it. Cool the temperature slider until the client's skin looks natural rather than judging by the nails, and the black will return to neutral.
Are black nail photos grainy?
Black nail photos often show grain, because a phone raises its sensor sensitivity in a dim salon and the resulting noise concentrates in the darkest areas of the image. Lifting shadows makes that grain visible. Keeping shadow lift small, and shooting nearer a window, both reduce it more effectively than a noise slider.
Should you use contrast on black nail photos?
Avoid raising contrast on black nail photos. Contrast pushes dark areas darker and bright areas brighter, so the nails lose their remaining sidewall detail while the glare stripe grows. Use a small amount of texture or clarity instead, which adds local definition without moving the overall tonal range.
Final Takeaways
- Shadows, not brightness. Exposure lifts the glare along with the nails.
- Stop when the free edge separates from the background, and not a step past it.
- Judge the cast on the skin, because black gel shows you almost no colour to work with.
- Leave some gloss. A reflection with tone in it is what makes the top coat read as shiny.
- Auto-enhance is the enemy of every black set, since it reads dark as broken.
- Matte black wants texture, gloss black wants highlight control. Different finishes, different edits.

Hannah
Hannah is a co-founder of NailTech, the nail image editor that turns quick phone shots into portfolio photos. She worked in the beauty industry before moving into mobile design, and now owns product and design on the app.



