
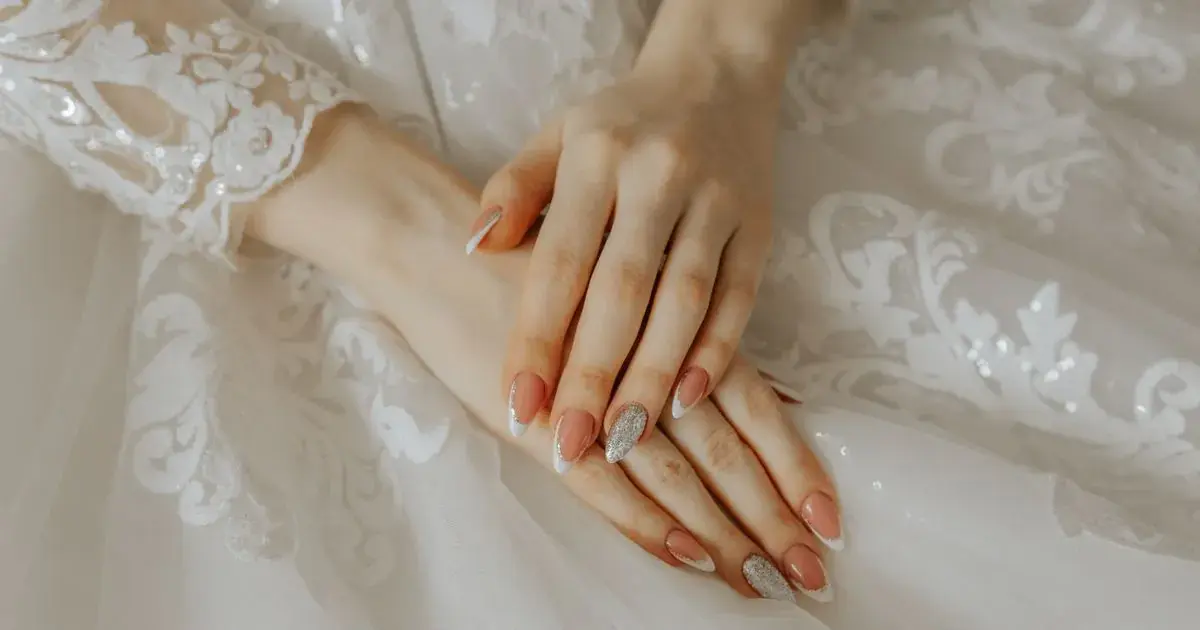
How to Photograph Coffin Nails
Quick answer: Shoot coffin nails from about forty-five degrees to the side rather than straight on, because the taper is what makes the shape and a head-on angle flattens it into a square. Keep the hand relaxed and slightly angled away, watch the hard reflection on the flat tip, and get the sidewalls straight before you shoot.
You filed the tapers for twenty minutes. Both sides even, the tip flat, the walls straight all the way down.
The photo makes them look square, and slightly wonky.
Why do coffin nails look square in photos?
Because the two features that define the shape sit on the sides, and a straight-on photo shows you the top.
A coffin, or ballerina, nail is a long nail with tapered sidewalls and a flat squared-off free edge. From directly above, the taper is compressed almost to nothing and what the camera records is a rectangle with a straight end. From an angle, the two walls converge visibly and the shape reads immediately.
The flat tip works against you as well. On an almond or a stiletto the eye follows the curve to a point and reads length. On a coffin the tip cuts the nail off, so a straight-on frame gives the eye a hard horizontal line right where the length should be resolving.
That is why so many coffin sets photograph as short squares despite being neither.
What angle shows the shape best?
Rotate the hand, not the camera.
Ask the client to relax the hand palm-down on the surface and then roll the wrist about forty-five degrees toward you, so you are seeing the top of the nails and a good slice of the sidewalls at once. Shoot from slightly above, roughly the height you would look at your own hand at.
Two things happen. The taper becomes visible, which is what says coffin rather than square. And the tips stop presenting as one flat line across the frame, because each nail is now at a slightly different distance and the eye reads that as depth.
Do not go so far that you end up shooting the side of the hand. Past about sixty degrees the nail beds foreshorten badly, the art disappears and the ring finger hides the middle finger. Forty-five is the useful range and it is worth taking three frames across it rather than committing to one.
The other angle worth taking on any coffin set is the classic relaxed claw, fingers curled loosely with the hand tipped forward, which shows the underside line of the free edge. That one is worth doing because it is the angle that proves the length is real.
How do you deal with the reflection on the flat tip?
Move the hand rather than the light.
A flat squared tip is a small mirror pointed slightly upward, so under a ceiling bulb it catches a hard bright band right across the end of every nail. Once that band is blown out there is nothing underneath it to recover, which makes it the one problem on a coffin set you genuinely have to solve before you press the shutter.
Tilt the fingers a few degrees down, away from the light source, and watch the band on the screen as you do it. It will slide off the tip and onto the top surface of the nail, where it looks like normal shine instead of a white stripe. That is usually a movement of less than a centimetre.
If you are near a window, turn the hand so the light is arriving from the side rather than from directly in front, which softens the band without losing the shine that makes the top coat look wet. There is more on the general problem in fixing glare on nail photos.
Does the length cause distortion?
Yes, and closer is worse.
Phone lenses are wide, so anything nearest the lens is rendered noticeably larger than things a few centimetres further away. On a long coffin set held toward the camera, the tips get enlarged and the nail beds get compressed, which produces the flared look where the free edges appear wider than the base. That is the opposite of what a coffin shape is supposed to do.
Back up and let the nails fill less of the frame, then crop in afterwards. Twenty-five to thirty centimetres from the hand is usually enough to stop the flare, and modern phone photos have plenty of resolution to crop into.
Keep the hand parallel to the phone as well. If the fingers point toward the lens the same effect stretches the nearest nail alone, and one enormous index finger is more distracting than any lighting problem. The same rule underlies most of photographing long nails.
What can the edit fix and what cannot it?
The edit handles colour, dust, background and the general warmth of the salon. It handles an uneven skin tone. It handles a slightly dark file.
It does not handle a blown-out tip band, a nail bent out of shape by lens distortion, or a set shot from an angle that hides the taper. Those are decisions made at the chair, and a coffin set is unusually unforgiving about them because the shape itself is the selling point.
So the split for this shape is clear. Get the angle and the tip reflection right in the sixty seconds you have with the hand, and leave the colour to the edit, where correcting it is quick and reversible. The routine for that side is in editing nail photos on your phone.
How do the setups compare on a coffin set?
| Setup | Taper visible | Tip reflection | Distortion | Effort |
|---|---|---|---|---|
| Straight down, hand flat | No, reads as square | Hard band across every tip | Low | None |
| Forty-five degree wrist roll, window light | Yes | Soft, sits on the nail surface | Low if you keep distance | Seconds |
| Close-up under the nail lamp | Partly | Severe, tips usually blown out | High, tips flare | None |
| Relaxed claw, tipped forward | Yes, plus the free edge line | Moderate, easy to move off | Low | Seconds |
| Ring light directly in front | Yes | Ring reflected in every tip | Low | Setup time |
A four-step setup for a coffin set
- Check the sidewalls before the photo, since a flat tip makes any asymmetry between the two tapers obvious in a way a rounded shape hides.
- Roll the wrist about forty-five degrees toward you so both walls of each nail are visible.
- Tilt the fingertips slightly down and watch the bright band slide off the flat tips.
- Back off to about thirty centimetres and crop in later, rather than filling the frame and flaring the tips.
Where NailTech fits in
A coffin set is the shape most likely to be shot in the evening, because long sets take long appointments and the last client of the day gets photographed under a lamp and a ceiling bulb rather than daylight. What arrives from that is a technically correct angle sitting inside a badly coloured file: warm, slightly dark, with the surface behind the hand fighting for attention.
NailTech is a nail image editor, so it takes the part of the problem that survives past the appointment.
- Neutralises lamp and ceiling warmth on a set shot at the end of a long day.
- Opens up a dark file without washing the hand out.
- Clears the station behind the hand so the length reads clean.
- Keeps colour consistent across the frames you took from different angles.
NailTech is a phone editor for nail photos, not a shape corrector. NailTech will not put a taper back into a set shot flat from above, and nothing else will either.
The taper is the entire point of a coffin nail, and a photo taken straight down removes it. Roll the wrist forty-five degrees and you have shot the shape rather than a long square.
Make your nail photos look salon-ready
Open NailTech and clean up the lighting, skin tone and background on every set you post, in a few taps.
Open NailTechFrequently Asked Questions
What is the best angle for photographing coffin nails?
The best angle for coffin nails is roughly forty-five degrees, with the client's wrist rolled toward the camera so both tapered sidewalls are visible along with the top of the nail. Straight-on photos compress the taper and make coffin nails read as long squares, which loses the shape entirely.
Why do my coffin nails look wonky in photos?
Coffin nails look wonky in photos because the flat squared tip makes any difference between the two tapers immediately visible, where a rounded shape would disguise it. Check both sidewalls against each other before shooting. Lens distortion adds to this when the hand is held close, flaring the free edges outward.
How do you stop glare on the tips of coffin nails?
Stop glare on coffin tips by tilting the fingertips a few degrees down and away from the light, which slides the bright band off the flat edge and onto the top of the nail where it reads as normal shine. A blown-out tip band cannot be recovered in editing, because no detail was recorded underneath it.
How far should the phone be from a coffin set?
Hold the phone about twenty-five to thirty centimetres from a coffin set and crop in afterwards. Closer than that, a wide phone lens enlarges whatever is nearest, which widens the tips and compresses the nail beds, producing a flared shape that is the opposite of the taper you filed.
Should you photograph coffin nails on both hands?
Photograph one hand well rather than both hands badly on a coffin set, because the shape needs an angled wrist that is hard to hold on two hands at once. Take a single-hand angled frame as the main shot, then add a both-hands frame from above only as a secondary image showing the matching set.
Final Takeaways
- Roll the wrist to forty-five degrees, because the taper is the shape and straight-on hides it.
- Tilt the tips down to move the reflection off the flat free edge.
- Stay thirty centimetres back and crop in, rather than flaring the tips with a close lens.
- Check both sidewalls first, since a flat tip exposes asymmetry a round tip forgives.
- Add the relaxed claw frame to prove the length is real.
- Leave the colour to the edit, and solve the angle and the glare at the chair.

Hannah
Hannah is a co-founder of NailTech, the nail image editor that turns quick phone shots into portfolio photos. She worked in the beauty industry before moving into mobile design, and now owns product and design on the app.



