
How to Edit Pedicure Photos
Quick answer: Edit pedicure photos in this order: correct the warm cast from the salon downlight, lift Shadows rather than Exposure so the toes come out of the dark, calm the redness on the surrounding skin locally, dull the shine on the shin, then crop at the ankle. Keep sharpening low, because it exaggerates dry skin texture.
The set looked great in the chair. Then you open the photo between clients and the toes are dim, the skin around the big toe is three shades redder than it was in person, and there is a towel, a footbath and half a bin in the frame.
None of that means a reshoot. Almost all of it is fixable on your phone before the next client sits down.
Why do pedicure photos need a different edit?
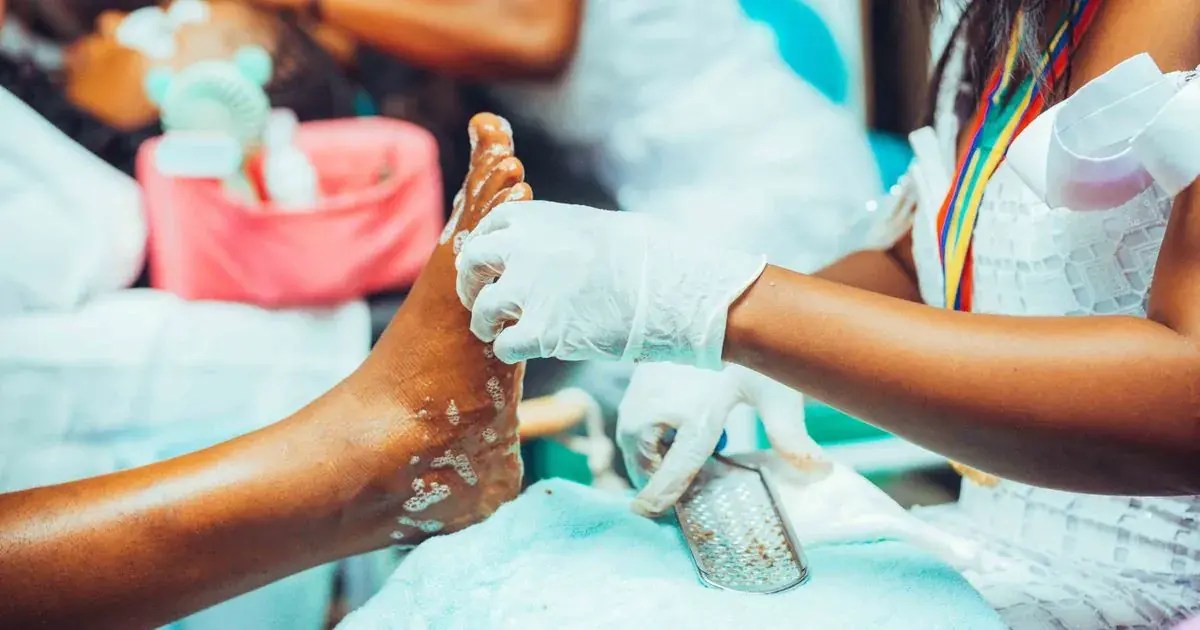
Because the ratio is upside down. In a hand photo the nails are the biggest thing in frame. In a pedicure photo the nails are ten small shapes at the end of a foot, and the foot is what the camera actually metered and focused on.
That has two consequences. Every global slider you move is mostly editing skin, not polish, so the edit has to lean on local tools more than a manicure edit does. And every flaw in the skin is bigger on screen than any flaw in the nails, so the skin work matters more than it does on a hand.
The good news is the polish itself usually needs very little. Toenail gel photographs flatter than fingernail gel, but the colour is normally close. It is everything around it that needs the work.
How do you fix redness around the toes?
Fix the colour cast first, then treat what is left locally.
A warm downlight makes every foot redder. Salon lighting sits somewhere between yellow and orange, and on skin that has just been filed and scrubbed it lands as red. Before you touch any skin tool, pull white balance toward neutral until the towel or the background reads as its real colour. Half the redness usually leaves with the cast.
What remains is genuinely in the skin: the flush around the big toe joint, the pink line where the file worked the sidewalls. That is a local job. Use a brush or selective tool, drop saturation slightly on just those patches, and stop while the foot still looks like a foot. The full order of operations, from cast to crop, is the same one covered in editing nail photos on your phone, with the skin step doing more of the lifting.
A client's foot does not need to look porcelain. It needs to look like it did an hour after the appointment, once the working flush settled. If they would not recognise their own foot, you have gone past correction. The same boundary applies as in fixing skin tone in nail photos: even it out, never repaint it.
Why are the toes so dark, and how do you brighten them?
The toes are dark because the light came from the ceiling and the nail plates slope away from it. The shin catches the light, the toes sit in its shadow, and the phone exposes for the bright shin.
Reach for Shadows, not Exposure. Raising Exposure brightens the already-bright shin first and blows it out before the toes look right. The Shadows slider lifts only the dark end of the frame, which is exactly where the nails are. Push it further than feels natural, then bring Blacks down a touch so the photo does not turn grey.
There is a limit worth being honest about. A dark file has recoverable detail in it; a blurry one does not. If the toes are soft because the phone focused on the knee, no slider brings the nail edges back, and that photo is a caption story, not a portfolio shot.
Can you fix shine and dry skin texture?
Shine yes, texture mostly by leaving it alone.
Oil shine comes down with Highlights. If the oil went on before the photo, the top of the foot and the shin will carry hot white patches. Pulling Highlights down shrinks them and usually keeps the gloss on the polish, because the polish highlight is smaller and denser. If one hot spot survives, a healing tool dabbed on the brightest point does the rest.
Dry skin and heel texture are the opposite problem. The instinct is to sharpen the photo so the nails look crisp, but sharpening is global in most apps, and it turns faint dryness on a knuckle or heel into visible flakes. Keep sharpening at or near zero on pedicure photos. If a patch of texture bothers you, soften that patch locally rather than smoothing the whole foot into plastic.
How do you clean up everything around the foot?
Crop first, because the crop deletes most of the problem for free.
A pedicure frame collects clutter like no other salon photo: the footbath rim, a drain, the client's rolled trouser leg, your own knee. Crop in until the frame holds the front half of the foot and a strip of surface, and most of it is gone. Whatever survives at the edges, a towel corner or a cable, is a cleanup or background job, and it is worth doing, because a viewer's eye goes to the brightest and busiest object in frame before it finds the nails.
If the background is beyond tidying, replace it rather than fight it. And if this happens every time, the fix is upstream: five seconds of staging before you shoot, covered in how to photograph pedicures, saves two minutes of cleanup after.
How do you make a pedi photo sit on a manicure grid?
Edit it toward the same end point as your hand photos, not toward its own mood: the same background tone if you can, and the same warmth and crop tightness. A grid of twenty hand photos and one blue-tinted foot from a different planet reads as an accident. The pedicure should look like the same business shot it.
How do the editing options compare?
| Option | Time per photo | Skill needed | Local skin correction | Colour accuracy on polish | Cost |
|---|---|---|---|---|---|
| Straight out of the phone camera | None | None | None, redness stays | Warm cast from downlights | Free |
| Instagram or TikTok filters | Seconds | None | Blurs skin and nail edges together | Poor | Free |
| Lightroom or Photoshop on a desktop | 5 to 15 minutes | High | Excellent with masks | Excellent | Subscription |
| NailTech on your phone | About a minute | Low | Built for skin around nails | Built for gel shades | App purchase |
The column that decides it for feet is local skin correction. A filter treats the whole frame as one thing, and on a photo that is mostly skin, that means the polish edge gets blurred along with the redness. A desktop editor does the job properly and costs you an evening a week. The middle path is a tool that already knows which part is nail.
A two-minute pedicure edit
- Correct the cast first. Pull white balance until the towel reads neutral. Watch half the redness disappear with it.
- Lift the Shadows slider until the toenails come up to meet the shin, then nudge Blacks back down.
- Calm the leftover redness locally, just around the toes and sidewalls, never the whole foot.
- Pull Highlights down to shrink oil shine on the shin and the top of the foot.
- Crop at the ankle, clean up whatever is left at the edges, and check it next to your hand photos before posting.
Where NailTech fits in
A pedicure file is the one photo from your week where the nails are the smallest thing in it, and every general tool you open treats it accordingly: face apps hunt for a face that is not there, and auto-enhance optimises a foot. NailTech is a nail image editor, and it treats ten toenails with the same priority it gives ten fingernails.
- Even out redness around the toes without smoothing the foot into plastic.
- Correct the downlight cast so the polish shade matches the bottle.
- Cut the shine on the shin while the gel keeps its gloss.
- Tidy or replace the background when the footbath made it into frame.
NailTech works on the file you already took, which matters for pedicures more than anything else you shoot, because nobody re-soaks a foot for a reshoot.
Redness around a freshly filed big toe is a thirty-second local edit. Toes the phone never focused on are not an edit at all, because there is no nail edge in the file to recover.
Make your nail photos look salon-ready
Open NailTech and clean up the lighting, skin tone and background on every set you post, in a few taps.
Open NailTechFrequently Asked Questions
How do you edit pedicure photos on your phone?
Edit pedicure photos by correcting white balance first to remove the warm salon cast, lifting the Shadows slider to brighten the toenails, reducing redness locally around the toes, and pulling Highlights down to cut oil shine. Crop at the ankle and keep sharpening near zero so dry skin texture stays invisible.
How do you fix red toes in photos?
Red toes in photos usually come from a warm salon light plus freshly worked skin. Correct the white balance first, which removes the shared cast, then use a local brush or selective tool to drop saturation slightly on the remaining red patches around the joints and sidewalls, leaving the rest of the foot untouched.
Why do my pedicure photos look dark?
Pedicure photos look dark because overhead salon lighting hits the shin while the toenails slope away into shadow, and the phone exposes for the bright shin. In the edit, the Shadows slider recovers the toes without blowing out the leg. At the next appointment, side light at foot height prevents it entirely.
Should you smooth feet in pedicure photos?
Smooth feet sparingly in pedicure photos. Evening out redness and softening one distracting dry patch is a fair correction, because cameras exaggerate both. Blurring the whole foot removes the skin texture that makes the photo believable and takes the crisp polish edge with it, which reads as fake at a glance.
Can you fix a blurry pedicure photo?
A blurry pedicure photo cannot genuinely be fixed. Sharpening tools increase edge contrast on detail that already exists, and a file where the phone focused on the knee has no nail-edge detail to enhance. Brightness, colour and redness are all recoverable afterwards; focus has to be right when you shoot.
Final Takeaways
- White balance first. Half the redness in a pedicure photo is the salon light, not the skin.
- Shadows, not Exposure, to bring the toes up without blowing out the shin.
- Treat redness locally around the toes, and stop while the foot still looks like their foot.
- Leave sharpening near zero. It turns faint dryness into visible flakes.
- Crop at the ankle and clean the edges, because clutter beats redness as a distraction.
- Match the edit to your hand photos so the pedi sits naturally on the grid.

Hannah
Hannah is a co-founder of NailTech, the nail image editor that turns quick phone shots into portfolio photos. She worked in the beauty industry before moving into mobile design, and now owns product and design on the app.



