
How to Film Nail Art Videos That People Watch
Quick answer: Film nail art videos in short clips rather than one long take. Fix the phone above the desk so your hands are free, lock focus and exposure before you start, open on the most visual moment instead of a bare nail, and keep the finished piece between seven and fifteen seconds. Most viewers decide within three.
Forty minutes of filming, a shaky angle, a clip where your own head blocks the light, and by the time you have trimmed it you have a hand doing something indistinct in a dim room. The gap between that and a competitor's ten second chrome reveal is almost never artistry. One was filmed with a plan and the other by propping a phone against a bottle of top coat.
What happens in the first three seconds?
Almost everything, and the data is blunt about it.
Metricool's 2026 Instagram study, which analysed more than 24.3 million posts across 375,000 accounts, found average watch time on reels has more than doubled year on year to 8.5 seconds, and that up to half of viewers drop off before the fourth second. The opening frame has to earn the next twenty on its own, with no context.
That rules out what nail videos habitually open with: a bare nail, a hand reaching for a bottle, a title card, you saying hello. Open instead on visible change or visible finish. A magnet pulling a cat eye band across a nail, chrome powder turning matte grey into mirror, or the finished set itself before you rewind into how it was made.
Show the destination early. Viewers stay for a process when they know what it builds towards.
How should you set up the phone to film hands?
Above the desk, fixed, pointing at a spot you have already tested.
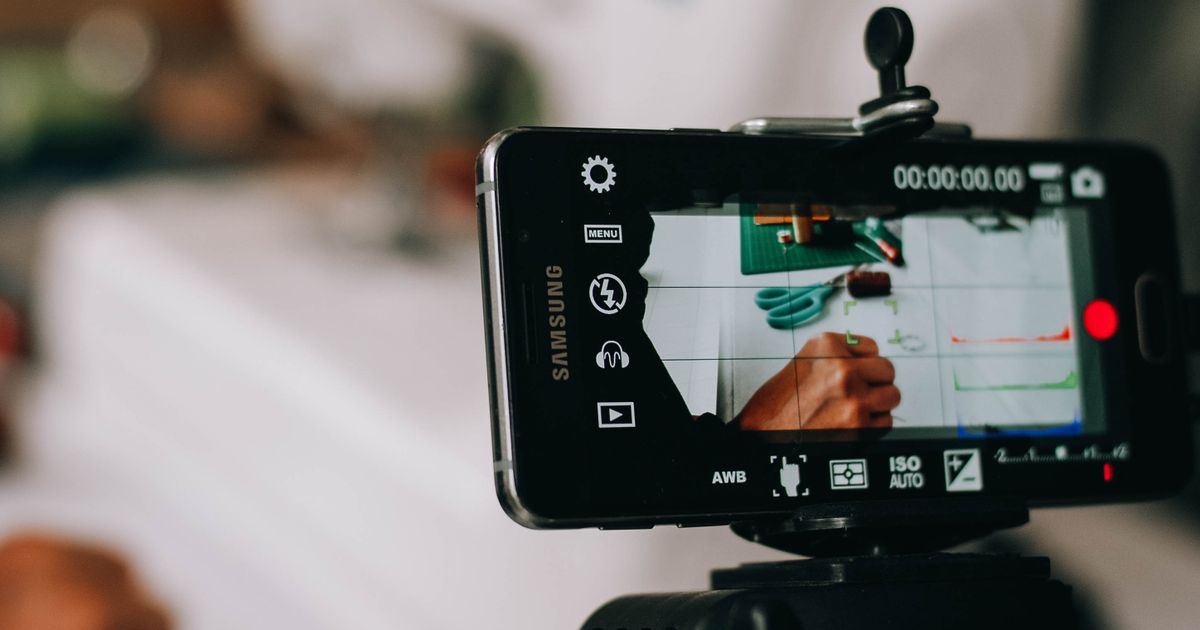
You need both hands for the work, so the phone has to hold itself. A clamp arm on the desk edge is the usual answer, and it does not need to be expensive. What matters is that it does not creep downwards while you film.
Set the framing so the working nail sits in the middle with a little room around it, then film five seconds and play it back before committing to the set. Filming a full design and finding your knuckle covers the nail for half of it is the most common wasted session.
Two settings save more footage than any gear does. Lock focus and exposure by pressing and holding on the nail before you hit record, or the phone refocuses every time your hand moves and hunts for exposure every time a sleeve enters the frame. And shoot at the highest quality your phone allows, so you can crop afterwards without turning the detail to mush.
What lighting works for filming versus stills?
One light, and one that stays put.
A photograph only has to catch a fleeting moment of decent light. Video runs for thirty seconds, and every flicker, shadow and colour shift ends up in the file. A window is excellent but drifts over a long session as clouds pass. A single LED panel with a diffuser is more reliable, because it holds one colour temperature all day.
The trap specific to video is your own body. Filming from overhead puts your head and shoulders between the ceiling light and the nail, so a shadow moves across the work every time you lean in. Put the light in front of you or to the side, at desk level, and the shadow disappears.
If the room has fluorescent tubes, film a test clip and look for banding, those faint rolling stripes. Your own panel light with the tube off fixes it. More on room lighting in best lighting for nail photos.
| Shot type | What it shows | Good length | Difficulty |
|---|---|---|---|
| Overhead static | The whole working process, clearly | 10 to 30 seconds raw | Easy once the arm is set |
| Close detail at 45 degrees | Brushwork, chrome, hand-painted lines | 3 to 8 seconds | Focus is fiddly |
| Reveal roll | The finished set catching light as the hand turns | 3 to 5 seconds | Easy, needs a steady model |
| Timelapse of a full set | Structure and effort behind a long build | Compressed to 10 seconds | Needs the phone locked for an hour |
| Before and after cut | The transformation, no process | 2 clips, 2 seconds each | Easy, needs matching framing |
How long should a nail art video be?
Shorter than the work took, and shorter than feels fair.
Seven to fifteen seconds is where nail content holds up, because the point is a visual result rather than an explanation. A thirty second video needs a reason to exist: a full transformation, a tutorial with real steps, or a story people follow.
The instinct to show every stage comes from pride in the work, and it costs the most watch time. Three seconds of prep, three of the build, three of the art and three of the reveal beats forty seconds of the whole appointment.
Video is not the only format worth posting. Socialinsider's 2026 Instagram benchmarks, drawn from 35 million posts across 447,613 pages, put carousel engagement at 0.55 percent against 0.52 percent for reels. The clip earns the reach and the carousel earns the save, which is why reels ideas for nail techs and a photo habit are not competing strategies.
How do you film a set without losing an appointment to it?
Film five short clips, not one long session.
Decide before the client sits down which five moments you want: prep, the build, the art detail, the top coat, the reveal. Record ten seconds at each and stop. Total filming time is under a minute and you have everything an edit needs.
Filming continuously through an appointment produces forty minutes of footage you then have to watch, and nobody watches it.
One extra clip is worth taking every time: the finished hand turning slowly under your light for three seconds. It works as an ending, alone as a post, and as the opening hook of a different video next week. Finishes with movement in them, like the magnetic gels in how to photograph velvet nails, need it most.
A five-clip filming plan
- Set the arm and test five seconds before the client arrives, checking your hand does not block the nail.
- Lock focus and exposure with a long press, every time you start a clip.
- Film the four working clips, ten seconds each, stopping between them.
- Film the reveal last, hand turning slowly under one light, three to five seconds.
- Cut to fifteen seconds maximum, opening on the strongest visual moment.
The frame that decides whether anyone presses play
A video has a still doing the hardest job in it: the cover frame. That image appears in your grid, in a profile visit and in a saved collection for as long as the post exists, and a cover pulled automatically from the middle of a clip is usually blurred, half lit, or of a hand reaching for something. Pick that frame yourself and treat it as a photo, which means running it through the same pass as everything else you post: editing nail photos.
NailTech is a nail image editor, so it handles the still side of a video habit rather than the footage.
- Fix the colour on a cover frame so a grid of video posts matches your photo posts.
- Clean the background in the still you post alongside the clip.
- Even out lighting on a screenshot pulled from a dim clip.
- Crop consistently so covers line up in the grid.
NailTech does not edit video, and nothing it does replaces locking exposure before you record. It works on the photos and cover frames that live around the clip.
Up to half your viewers are gone before the fourth second, so the frame you open on decides the fate of a set that took two hours to build.
Make your nail photos look salon-ready
Download NailTech and clean up the lighting, skin tone and background on every set you post, in a few taps.
Download on App StoreFrequently Asked Questions
How do nail techs film their videos?
Nail techs film videos with the phone fixed above the desk on a clamp arm, leaving both hands free to work. They lock focus and exposure on the nail before recording, use one constant light source at desk level rather than overhead, and film several short clips instead of one continuous take.
How long should a nail art video be?
A nail art video should usually run between seven and fifteen seconds. Metricool's 2026 study found average Instagram reel watch time is 8.5 seconds, with heavy drop-off before the fourth second. Longer videos work only when there is a genuine transformation or tutorial structure holding attention.
Why does my nail video keep changing brightness?
A nail video changes brightness because the phone is adjusting exposure automatically as hands and sleeves move through the frame. Press and hold on the nail before recording to lock focus and exposure. Fluorescent salon tubes can also cause rolling bands, which a single LED panel eliminates.
Do videos or photos work better for nail techs?
Videos and photos do different jobs for nail techs. Reels reach new people, while carousels earn higher engagement, at 0.55 percent against 0.52 percent in Socialinsider's 2026 benchmarks. Film the process for reach, post the finished stills for saves, and use the same set for both.
Final Takeaways
- Open on the strongest visual moment, never on a bare nail or an introduction.
- Fix the phone above the desk and test five seconds of framing before the client sits down.
- Lock focus and exposure with a long press, every clip, without exception.
- Light from desk level in front of you, so your own shoulders stop casting a moving shadow.
- Five short clips beat one long take, and take under a minute of appointment time.
- Always film the reveal, because a three second turning hand is the most reusable clip you own.

Hannah
Hannah is a co-founder of NailTech, the nail image editor that turns quick phone shots into portfolio photos. She worked in the beauty industry before moving into mobile design, and now owns product and design on the app.



