
How to Edit Brown Nail Photos
Quick answer: Brown is the only shade family that sits in the same part of the colour wheel as skin, so the problem is separation rather than cast. Set the temperature on the hand, then create contrast between the nail and the finger with luminance rather than saturation. Cooling the file too far turns mocha into mud.
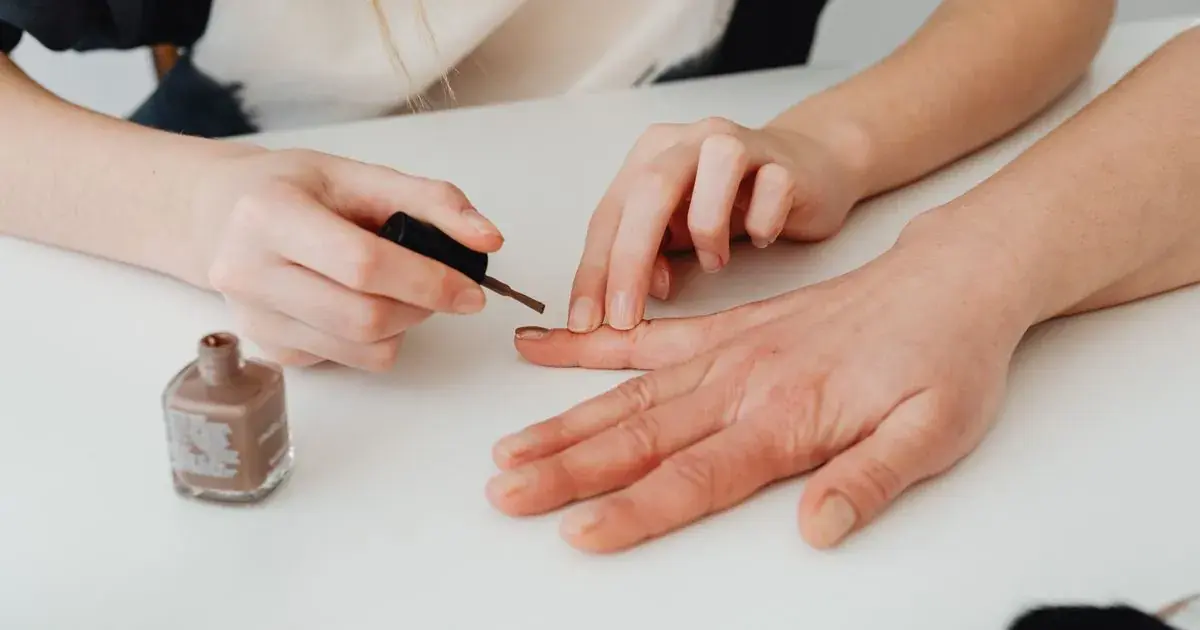
Mocha, latte, cinnamon, espresso. On the desk the shade sits against the client's hand and reads as a deliberate choice.
In the photo the nails and the fingers have merged into one brown shape.
Why do brown nails disappear into the skin in photos?
Because brown and skin are neighbours.
Every other popular shade sits somewhere skin does not. A cobalt, a sage, a fuchsia and a black all contrast with a hand automatically, so even a mediocre photo keeps them separate. Brown is made of the same red and yellow that skin is made of, at a similar saturation, often at a similar brightness. There is nothing built into the file forcing the eye to see two things.
Warm salon light makes this worse in a way that is easy to miss. It does not shift brown to a different hue, it pushes the skin toward the nail. A hand that was a shade lighter and pinker than the polish becomes a hand that is almost the same colour as the polish, and the set stops reading as a set.
So the diagnosis is different from the one you would make on a green or a blue. Nothing has gone the wrong colour. The two things in the photo have simply converged.
Why does cooling the photo make brown look muddy?
Because you are removing the ingredient the shade is made of.
The standard salon correction is to pull temperature down until the yellow cast lifts. On a white or a pale pink that works, because those shades contain very little warmth of their own. Brown is warmth. Take the temperature down far enough to fully neutralise the room and you take the red and orange out of a mocha as well, and what is left is a flat grey-brown that looks like the polish was old.
The rule that keeps you out of trouble: judge the temperature on the client's skin and never on the nail. Stop cooling the moment the hand looks like the hand, even if the polish still feels slightly warm to you. It usually is not; you are just comparing it to a memory formed under a different light.
Cool taupe and greige are the exception, and they need a lighter touch still, because a small over-correction there tips them into a colour nobody chose.
Which brown are you actually editing?
Four families, four different problems.
Mocha, latte and caramel
Pale and mid-tone browns, and the ones that vanish into light and medium skin. The whole edit is separation. Once white balance is set, add contrast rather than saturation and let the nails sit slightly darker than the finger.
Pantone naming PANTONE 17-1230 Mocha Mousse its Colour of the Year for 2025 put a lot of these shades on a lot of hands, and they are still moving. They are also the hardest browns to photograph, so the volume and the difficulty arrived together.
Chocolate and espresso
Dark browns behave like blacks. The camera meters for the bright hand and the bright desk, underexposes the polish, and what comes back is a nail that reads black with a suggestion of brown somewhere inside it.
Lift shadows, not exposure. Exposure raises the hand too and undoes the separation you need. Shadow recovery opens the bottom of the range, which is where the brown is actually hiding.
Rust, terracotta and cinnamon
The most saturated browns, and the ones that overshoot. Warm salon light plus an already-orange shade means these often arrive looking like a bright orange rather than a burnt one. Pull temperature back a little and take saturation down rather than up.
Taupe, greige and mushroom
Cool browns, which are only cool by a small margin. Nearly all their character lives in a slight grey cast that a warm room removes entirely. These need the tint slider as well as temperature, and they are worth checking against a neutral object in the frame rather than by eye.
How do you separate brown nails from the hand?
Three moves, in order of how much they help.
Luminance first. Make the nails slightly darker or slightly lighter than the surrounding skin. A small amount of separation in brightness does more than any colour change, because the eye reads edges from brightness far faster than it reads them from hue.
Then take the cuticle line. A clarity or structure lift at nail scale strengthens the boundary between polish and skin without touching the overall exposure. Keep it gentle, because the same slider that sharpens a cuticle line also makes a hand look leathery.
The background comes last, and the single biggest gain on a brown set often comes from what is behind it. A brown set on a wooden desk or a beige towel has nothing to push against. Move to a white, grey or dark surface and the shade suddenly reads. If the photo already exists and the client has gone, that is a background swap rather than a reshoot, and the options are in removing the background from nail photos.
Saturation is deliberately not on this list. Pushing it makes the nails more orange and the skin more orange at the same time, so the gap stays where it was and everything looks worse. There is a longer catalogue of that kind of own goal in nail photo editing mistakes.
How do the options compare on a brown set?
| Approach | Nail separates from skin | Shade stays true | Time per photo | Cost |
|---|---|---|---|---|
| Straight out of the phone | No, warm light merges them | Mostly | None | Free |
| Auto enhance | No, it raises saturation on both | Rarely | Seconds | Free |
| Instagram or TikTok filters | No, warm presets merge them further | No, rust goes orange | Seconds | Free |
| Snapseed or Lightroom Mobile | Yes, with luminance and clarity by hand | Yes, with care on temperature | 4 to 8 minutes | Free or paid tier |
| NailTech | Yes, nail and skin treated separately | Yes | About a minute | App purchase |
A four-step edit for a brown set
- Set temperature on the hand and stop the moment the skin looks right, even if the polish still reads warm.
- Check tint on any taupe, greige or mushroom shade, because their character is a grey cast a warm room removes.
- Separate by brightness, nudging the nails slightly darker or lighter than the finger rather than more saturated.
- Lift shadows instead of exposure on chocolate and espresso, and consider changing the surface behind the hand.
Where NailTech fits in
Brown is the one shade family whose problem is not a cast at all. The polish and the client's hand are made of the same red and yellow, at a similar brightness, and warm salon light pushes them closer together until the photo shows one brown shape where the desk showed two.
NailTech is a nail image editor, so the nail and the skin are treated as two things with different jobs rather than as one warm area to correct together.
- Holds the separation between a mocha set and the hand it sits on.
- Stops the over-correction that turns a warm brown into grey mud.
- Opens espresso shades without brightening the hand along with them.
- Keeps rust and terracotta from arriving as bright orange.
- Cleans or swaps the background when a wooden desk is what is swallowing the shade.
NailTech is a phone editor for nail photos, not a colour matching system. NailTech restores the separation the light removed, it cannot tell a latte from a caramel on your shelf.
Brown is the only shade where the correction that saves every other colour, cooling the file until the yellow lifts, actively destroys the polish. Stop the moment the hand looks right, not the moment the nail does.
Make your nail photos look salon-ready
Open NailTech and clean up the lighting, skin tone and background on every set you post, in a few taps.
Open NailTechFrequently Asked Questions
Why do my brown nail photos blend into the skin?
Brown nails blend into skin because both are made of red and yellow at a similar saturation and brightness, so nothing in the file forces the eye to see two separate objects. Warm salon lighting pushes the hand further toward the polish. Separate them with a small brightness difference rather than with saturation.
How do you stop brown nails looking muddy after editing?
Stop cooling the temperature as soon as the client's skin looks correct. Brown is built from warmth, so continuing to pull the temperature down removes the red and orange that make a mocha look like mocha and leaves a flat grey-brown. Judge the correction on the hand, never on the nail.
How do you edit dark chocolate nail photos?
Lift the shadows rather than the exposure on dark chocolate and espresso nail photos. The camera meters for the brighter hand and desk, so the polish is underexposed and reads black. Shadow recovery opens the darker end of the file where the brown is, while exposure would brighten the hand and remove the separation.
What background works best for brown nails?
Choose a white, grey or dark background for brown nails. Wooden desks, beige towels and tan surfaces sit in the same colour family as the polish, so the shade has nothing to contrast against. If the photo has already been taken, swapping the background in an editing app achieves the same separation.
Should I raise saturation on brown nail photos?
Avoid raising saturation on brown nail photos. Skin and brown polish share the same red and yellow, so a global saturation lift intensifies both at once and the gap between them stays exactly where it was. Use a brightness difference and a small clarity lift at the cuticle line instead.
Final Takeaways
- The problem is separation, not a colour cast, which changes every decision after it.
- Stop cooling when the hand looks right, because brown is made of the warmth you are removing.
- Brightness beats saturation for pulling a mocha away from a finger.
- Espresso needs shadows, not exposure.
- Taupe and greige need tint, since their character is a grey a warm room deletes.
- Change what is behind the hand, because a wooden desk quietly eats the whole shade.

Hannah
Hannah is a co-founder of NailTech, the nail image editor that turns quick phone shots into portfolio photos. She worked in the beauty industry before moving into mobile design, and now owns product and design on the app.



