
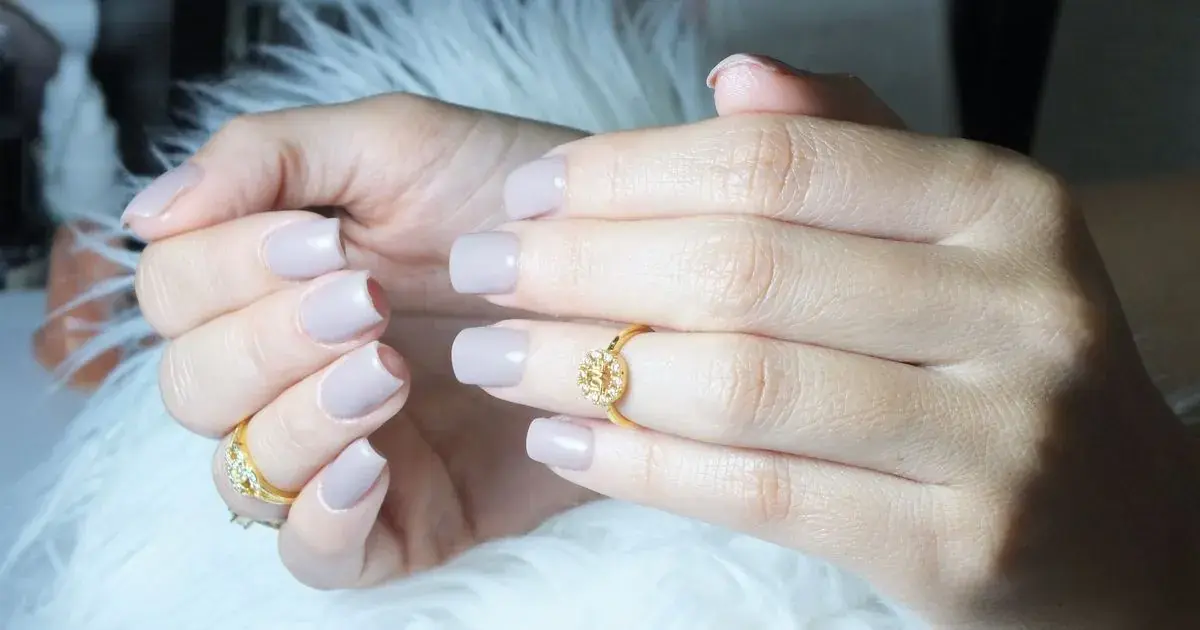
How to Edit BIAB Nail Photos
Quick answer: Edit BIAB nail photos by neutralising the salon cast first, then using highlights and a small amount of texture to bring back the apex and the cuticle line. Keep saturation low, because BIAB shades are sheer and the whole point of the photo is showing structure, not colour.
BIAB sells on how natural it looks, which is exactly why it photographs so badly. There is no bold shade doing the work for you, no glitter catching the light. Just a subtle nude overlay whose entire appeal is the shape of it.
And shape is the first thing a phone camera throws away.
Why is BIAB harder to photograph than a colour set?
Because you are photographing structure rather than pigment.
A red set survives a mediocre photo. The colour carries it, the eye goes straight to the shade, and even a slightly flat image still reads as a good manicure. BIAB has none of that safety net. What makes a BIAB overlay worth the money is the apex sitting in the right place, the cuticle line so clean you cannot see where product meets skin, and the strength you cannot photograph at all.
Take that away and you have a photo of some fairly ordinary-looking natural nails.
There is a colour problem underneath it too. Sheer nude product has so little pigment that your phone's automatic white balance has nothing to lock onto, so it guesses from the room. In a salon the room is a warm bulb and a wooden desk, so the guess is warm, and your soft milky pink arrives on screen as beige.
How do you bring the apex back?
Highlights and texture, in that order, both used lightly.
The apex is visible in a photo only because of the small highlight sitting on it. That highlight is what tells someone looking at your grid that the nail has a curve rather than being flat. If your top coat is glossy, the phone will often blow that highlight out to pure white, and a pure white blob does not read as a curve, it reads as glare.
Pull the highlight slider down and the reflection gains tone again, which restores the sense of a rounded surface. Do it in small steps and watch the middle of the nail rather than the whole photo.
Then add a small amount of texture or clarity. This is the slider that redraws the sidewalls and the edge of the apex, and on a BIAB set it does more good than anything else on the panel. Keep it modest. Too much and the cuticles and knuckles turn crunchy, which is the standard overedit and looks worse than the original.
Do not use contrast for this
Contrast is the obvious reach and the wrong one. It darkens the sidewalls, which sounds helpful, but it also brightens the apex highlight you just spent time bringing back, and it deepens every crease in the client's fingers. A hand with contrast pushed on it looks older and rougher than it is.
How do you correct the colour on a sheer nude?
Judge the temperature on the skin, not on the nails.
This is more important with BIAB than with any other service, because the product is close enough in tone to the nail bed that you genuinely cannot tell where the cast stops and the shade begins. If you drag the warmth slider while looking at the nails, you will overcorrect, and the client's hand goes grey.
Use the knuckles as your reference. Pull temperature until the hand looks the way it looked in front of you, and the overlay will land correctly by itself.
Then leave saturation exactly where it is. A saturation boost on a BIAB set does nothing much to the sheer product and turns the surrounding skin orange, which is a specific look that clients notice instantly. If you want the shade to read a little warmer, use temperature, not saturation. The general running order for all of this is set out in a repeatable nail photo editing routine.
What about the cuticle line?
Zoom in before you post, because BIAB photos live or die there.
A clean cuticle line is the visible proof of a good prep and a controlled bead, and it is the thing another nail tech will look at first. It is also small enough that phone processing smooths it away and Instagram's compression finishes the job.
Two things help. A light texture increase keeps the boundary crisp through the export. And a tight crop matters more than it does on a colour set, because a BIAB photo that includes the whole hand and half the desk gives the viewer nothing to look at. Get close enough that the cuticle area occupies a real part of the frame. Cropping for the grid is worth doing deliberately rather than by eye, and the sizes are covered in cropping nail photos for Instagram.
Do not smooth the skin around the cuticle. It is tempting, and it turns the finger into wax, which reads as fake far faster than a slightly dry cuticle ever would.
How do the options compare on a BIAB set?
| Approach | Sheer shade accuracy | Apex and structure | Cuticle line survival | Time per photo |
|---|---|---|---|---|
| Straight out of the phone | Usually warm and beige | Flattened by processing | Softened | None |
| Instagram or TikTok filters | Shifts the nude noticeably | Often worse | Lost to compression | Seconds |
| Snapseed or Lightroom Mobile | Accurate with manual control | Good, with selective tools | Good | 4 to 8 minutes |
| NailTech | Held against skin tone | Apex and sidewalls kept | Kept crisp | About a minute |
The filter row is worth a second look here. On a bold shade a filter is a stylistic choice; on a nude overlay it changes the actual product the client thinks they are booking.
A four-step BIAB edit
- Set temperature by the knuckles until the hand looks natural, which places the nude shade correctly on its own.
- Pull highlights down until the apex reflection has tone in it rather than a white blob.
- Add a small amount of texture to redraw the sidewalls and the cuticle line.
- Crop in close, so the structure fills the frame instead of competing with the desk.
Where NailTech fits in
The whole argument for BIAB is what the nail looks like at week three, and none of that survives a phone's automatic processing. It smooths the apex, softens the cuticle line, guesses a colour temperature from a wooden desk, and hands you a photo of some pleasant natural nails. Correcting that means restoring structure and shade at the same time, in small amounts, and then repeating both on the other hand and the close-ups so the set posts together.
NailTech is a nail image editor, tuned for the corrections a sheer overlay actually needs.
- Places the nude shade correctly by reading the hand, not the product.
- Restores apex and sidewalls without crunching the cuticles.
- Keeps skin looking like skin rather than waxy or orange.
- Clears the desk behind an already-subtle set.
- Matches every photo of the same appointment.
NailTech is a phone editor for nail photos, not a retoucher that invents structure. If the apex was out of focus when you shot it, sharpening will not put it back.
A BIAB photo is judged on two millimetres of cuticle line and the curve of the apex. Both are small enough that automatic phone processing smooths them away before you ever open the camera roll.
Make your nail photos look salon-ready
Open NailTech and clean up the lighting, skin tone and background on every set you post, in a few taps.
Open NailTechFrequently Asked Questions
Why do my BIAB nails look beige in photos?
BIAB nails look beige in photos because sheer nude product gives your phone's automatic white balance almost no colour to lock onto, so it guesses from the room instead. A warm salon bulb over a wooden desk pushes that guess orange. Cool the temperature slider until the client's skin looks natural and the shade corrects itself.
How do you show the apex in a BIAB photo?
Show the apex in a BIAB photo by pulling the highlight slider down until the reflection on the curve holds tone rather than blowing out to white, then adding a small amount of texture or clarity to redraw the sidewalls. Avoid contrast, which brightens the apex highlight back out while darkening the client's skin.
Should you sharpen BIAB nail photos?
Sharpen BIAB nail photos only lightly, using texture or clarity rather than a heavy sharpen slider. A small increase keeps the cuticle line crisp through Instagram's compression. Too much turns knuckles and cuticles crunchy and grainy, which reads as an overedit and looks worse than the untouched photo.
How do you photograph BIAB so it looks different to bare nails?
Photograph BIAB so it looks different to bare nails by shooting close enough that the apex curve and cuticle line fill the frame, using soft window light from the side so the apex casts a visible highlight, and angling the hand slightly so the shine runs along the nail rather than straight back at the camera.
What editing settings suit a BIAB manicure?
A BIAB manicure suits a cool temperature correction judged on the skin, highlights lowered, a small texture increase, and saturation left untouched. Contrast and saturation both damage sheer nude work, because contrast ages the skin and saturation turns the hand orange without changing the near-colourless product at all.
Final Takeaways
- BIAB is a structure photo, so the edit's job is apex and cuticle line, not colour.
- Correct temperature on the knuckles, because the sheer product gives you nothing to judge by.
- Highlights down to turn a white blob back into a curved surface.
- A little texture, no contrast. One redraws the sidewalls, the other ages the hand.
- Crop in tight, since a distant BIAB photo shows nothing worth looking at.
- Never smooth the skin. Waxy fingers read as fake faster than a dry cuticle does.

Hannah
Hannah is a co-founder of NailTech, the nail image editor that turns quick phone shots into portfolio photos. She worked in the beauty industry before moving into mobile design, and now owns product and design on the app.



